Accessories · Worked in rows
Crochet Puff Stitch Bandana Pattern
By Looplader · Tested row by row · Updated
- Skill
- Easy
- Hook
- 4.0 mm (G/6)
- Yarn
- DK-weight smooth cotton (CYC 3)
- Time
- One relaxed day for toddler or child; one to two evenings for adult
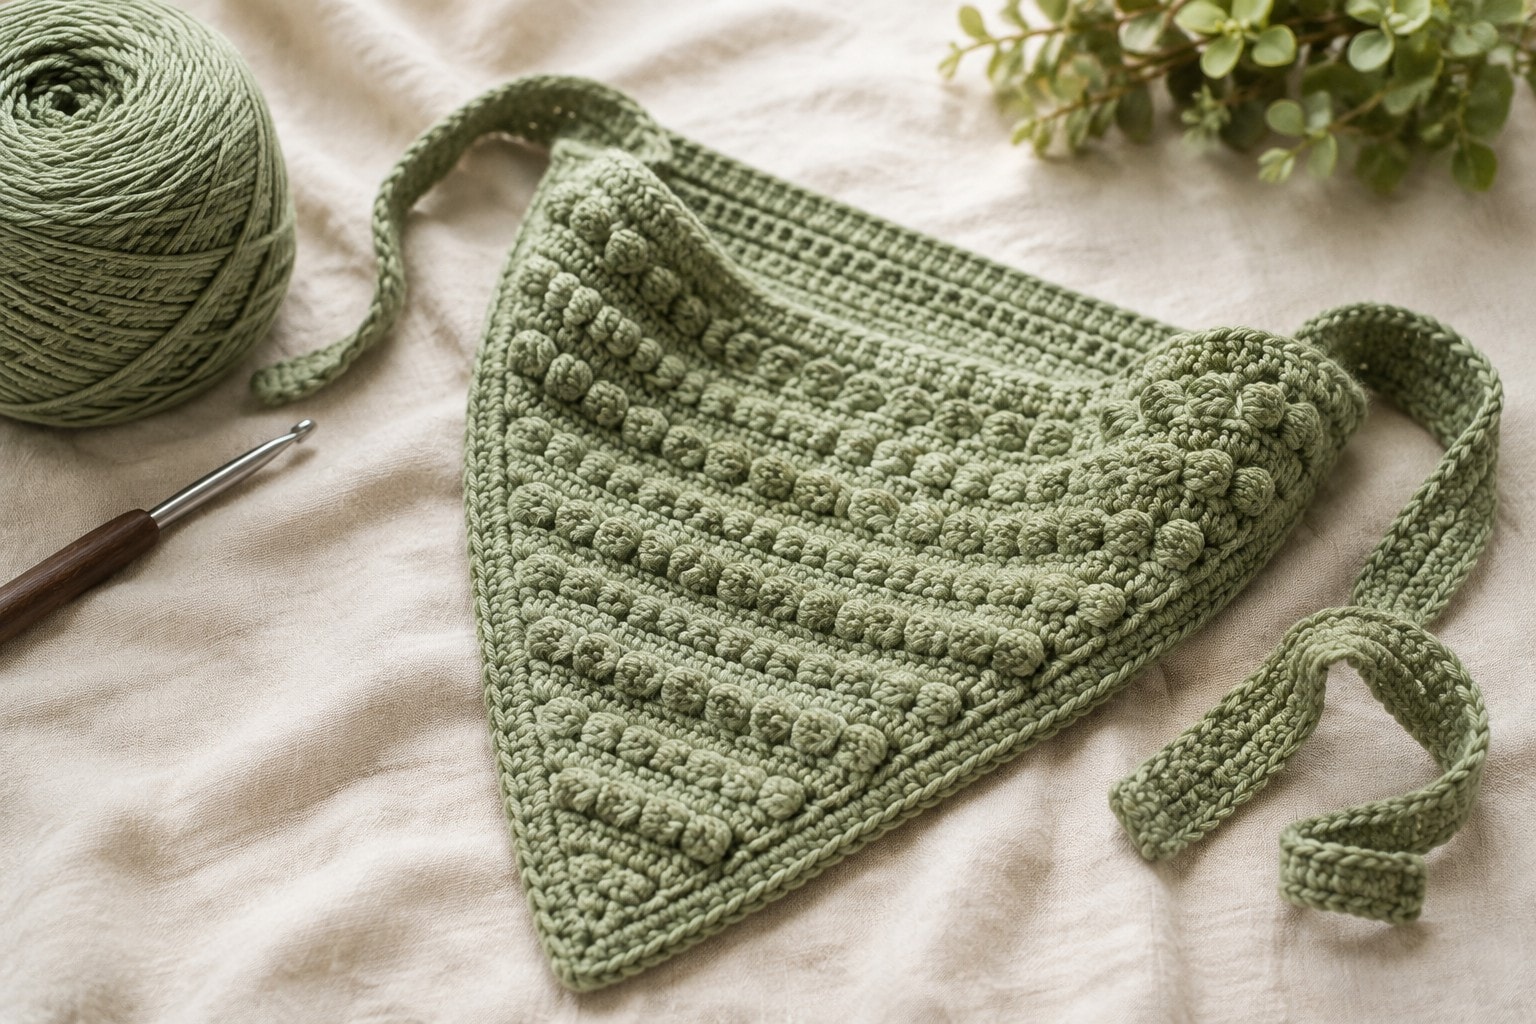
This crochet puff stitch bandana is worked flat from the straight top edge down to one neat point. Alternating puff rows and single-crochet rows give the triangle soft texture without making it heavy, while one decrease at each edge keeps both slopes even.
Choose the toddler, child, or adult foundation count, work the same two-row rhythm until four stitches remain, then add a fine edging and flat returned-single-crochet ties. The size chart gives a starting point; because puff stitches are dimensional, check the top edge on the intended wearer before committing to the ties.
Why you’ll love this pattern
- One repeated puff-and-single-crochet pair forms the entire textured triangle.
- A clear three-size chart removes guesswork at the foundation and tie stage.
- The body decreases from a straight top edge, so the final point closes tidily.
- Returned-single-crochet ties are flatter and more comfortable than plain chains.
Instructions
- 1
Sizing and gauge: Make a 4 in / 10 cm swatch in alternating puff and single-crochet rows, wash it as you plan to wash the finished bandana, and let it dry flat. Aim for about 15 sc stitches and 16 rows over 4 in / 10 cm in the single-crochet rows; the puff rows will be thicker. Use the chart as your starting size, then measure the finished straight top edge before attaching the ties.
- 2
Choose one size. With the right side facing, chain 45 (Toddler), 53 (Child), or 61 (Adult). Row 1: starting in the second chain from hook, sc in every chain across. You have 44 (52, 60) sc. Ch 1 and turn. Put a marker in each end stitch now; those two edges are the only places where the triangle decreases.
- 3
Puff decrease row (Row 2): ch 1; sc2tog over the first 2 sts. Then work [puff in the next st, ch 1, skip the next st] across until 2 sts remain; sc2tog over the final 2 sts. The row has 42 (50, 58) positions, counting each ch-1 space. Ch 1 and turn. Count the puffs rather than guessing: Row 2 has 20 (24, 28) puffs.
- 4
Single-crochet decrease row (Row 3): ch 1; sc2tog over the first 2 positions, sc in every puff and every ch-1 space across, then sc2tog over the final 2 positions. You have 40 (48, 56) sc. Ch 1 and turn. This plain row is important: it stabilizes the puffs and gives the next textured row clean places to work.
- 5
Continue the two-row rhythm: repeat the puff decrease row, then the single-crochet decrease row. Every row removes exactly 2 positions, one at each edge. After Row 5 you have 36 (44, 52) sc; after Row 9 you have 28 (36, 44) sc; after Row 13 you have 20 (28, 36) sc. Lay the work flat at each checkpoint. If one slope is longer, an edge sc2tog was missed or a ch-1 space was accidentally skipped twice.
- 6
Finish the body at the size chart's final body row: Row 21 for Toddler, Row 25 for Child, or Row 29 for Adult. Four sc positions remain. Closure row: ch 1, sc2tog twice. (2 sts) Fasten off, leaving a 6 in / 15 cm tail. Thread the tail through both final stitches, pull gently to sharpen the point, and weave the end up the inside of the nearest decrease edge.
- 7
Neaten the two slopes: join yarn at one top corner with the right side facing. Work one sc in each row end down the first slope, 3 sc in the point, then one sc in each row end up the second slope. Slip stitch into the top corner and do not fasten off. The border should sit flat; if it ripples, skip one row end every 6 to 8 rows on your next attempt.
- 8
First flat tie: from the corner on your hook, chain 55 (Toddler), 70 (Child), or 85 (Adult). Sc in the second chain from hook and in every remaining chain back to the corner. Slip stitch into the same corner. For the second tie, slip stitch along the top edge to the opposite corner, then repeat the tie instructions using the same chain count. Fasten off and weave all tails into the solid top-edge stitches.
- 9
Block and fit: soak the bandana briefly, roll it in a towel to remove excess water, then pin the top corners and point into a symmetrical triangle. Do not stretch the puff rows flat; lift them gently with your fingers so the texture remains raised. When dry, tie it at the nape with the textured side out. If the top edge is too short for comfortable coverage, add a longer tie rather than pulling the triangle wider.
| Size | Foundation chain | Work body through | Tie chain at each corner | Approx. top edge | Approx. depth |
|---|---|---|---|---|---|
| Toddler | 45 | Row 21 | 55 | 12 in / 30 cm | 5 1/2 in / 14 cm |
| Child | 53 | Row 25 | 70 | 14 in / 36 cm | 6 1/2 in / 16.5 cm |
| Adult | 61 | Row 29 | 85 | 16 in / 41 cm | 7 1/2 in / 19 cm |
Tips for success
- Pull every loop of a puff stitch to the same height before the final yarn-over. Uneven loops create lumpy puffs and a wavy row.
- Treat every ch-1 space as a place to work on the following single-crochet row. Missing those spaces makes the triangle narrow too quickly.
- Use smooth cotton or a cotton-rich blend for the clearest puff definition. Fuzzy yarn can hide the spaces that make counting simple.
- Add length to the ties before changing the triangle itself. Longer ties solve a close fit without distorting the straight top edge.
Pattern at a glance
- Time to make
- One relaxed day for toddler or child; one to two evenings for adult
- Skill level
- Easy
- Hook
- 4.0 mm (G/6)
- Yarn weight
- DK-weight smooth cotton (CYC 3)CYC standard
- Yardage
- ~70 yd toddler, 95 yd child, or 125 yd adult of DK cotton
- Gauge
- 15 sc x 16 rows = 4 in / 10 cm in single crochet after washing; puff rows are thicker
- Finished size
- Toddler: about 12 x 5 1/2 in; Child: 14 x 6 1/2 in; Adult: 16 x 7 1/2 in, plus ties
Free ebook
Get new patterns, and the ebook
New patterns as they land, plus our free beginner's crochet stitch guide. No daily blasts, unsubscribe in one click.
Frequently Asked Questions
Why is my puff stitch bandana curling at the top edge?
The top edge curls when the foundation chain is tighter than the worked fabric. Make the starting chain with a hook 0.5 mm larger, then return to the stated hook for Row 1; do not add random stitches to the edge.
How do I make the adult bandana deeper?
Start with a longer even foundation so there are more decrease rows before four stitches remain. Add 8 chains for roughly four extra rows, then add the same tie length only after the top edge is comfortable.
Why are my side edges uneven?
Each row must begin and end with one sc2tog. On puff rows, work the final decrease after the last complete puff-and-chain repeat; on the next row, work into every puff and every chain space before that final decrease.
Can I use acrylic yarn?
Yes, but a smooth cotton or cotton-rich DK yarn gives a cooler bandana and keeps the puffs more defined. If using acrylic, wash and dry the swatch first because its drape and final measurement can change.