Accessories
Crochet Lace Bandana Pattern
By Looplader · Tested row by row · Updated
- Skill
- Easy
- Hook
- 3.5 mm
- Yarn
- Sport-weight cotton (CYC 2)
- Time
- One relaxed day
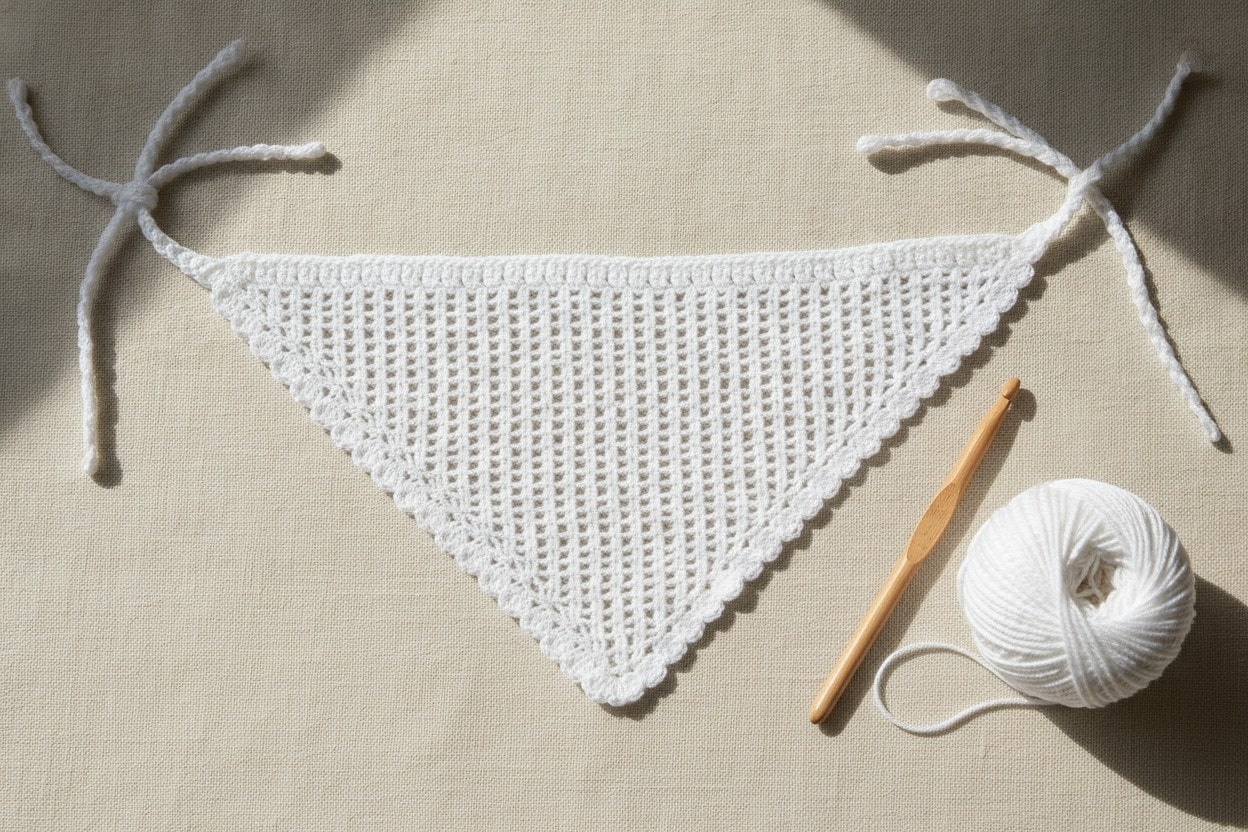
This crochet lace bandana is a one-piece triangle with a compact three-row point, an open mesh body, and a tiny picot finish along the two sloping edges. The solid start keeps the point neat; the repeated chain spaces create the airy fabric after the shape is established.
You choose the final size before adding the edge and ties. The body repeat adds width at both top corners, so you can stop at a smaller hair scarf or continue for more coverage without changing the lace sequence.
Why you’ll love this pattern
- The first three compact rows make a stable point before the openwork begins.
- One repeat controls both the mesh and the two edge increases.
- A fine picot edge gives the lace a finished outline without adding bulk.
- The long ties are returned single crochet, so they are easier to knot than a bare chain.
Instructions
- 1
Make a swatch before you start. Work a small sample in the lace body repeat, wet it, and let it dry flat. Aim for about 18 hdc/mesh slots and 13 rows = 4 in / 10 cm after blocking. Lace opens when it is washed, so measure the dry blocked sample rather than the hook-tight sample.
- 2
With cotton, ch 3. Row 1: work 2 hdc in the 3rd ch from hook. The skipped 2 ch count as the first hdc, so Row 1 has 3 hdc. Ch 2, turn. Row 2: work 2 hdc in the first st, hdc in the next st, then 3 hdc in the top of the turning ch-2. (7 hdc) Ch 2, turn.
- 3
Row 3: work 2 hdc in the first st, hdc in each st across to the final turning ch-2, then 3 hdc in the top of that ch-2. (11 hdc) Ch 2, turn. These three compact rows stop the point from stretching before you introduce chain spaces.
- 4
Row 4, first mesh row: work 2 hdc in the first st. *Ch 1, skip the next st, hdc in the next st.* Repeat from * across until 1 st remains before the turning ch-2; ch 1, skip that st, then work 3 hdc in the top of the turning ch-2. Ch 2, turn. Mark the first chain space at each side; those side spaces help you find the increase line on the next row.
- 5
Row 5: work 2 hdc in the first st. *Hdc in the next ch-1 sp, ch 1, skip the next hdc.* Repeat from * across, ending with hdc in the final ch-1 sp; work 3 hdc in the top of the turning ch-2. Ch 2, turn. From now on, every mesh stitch is worked into a chain space, not around the posts. This is what keeps the holes aligned instead of drifting diagonally.
- 6
Rows 6-28: repeat Row 5. Lay the fabric flat after Rows 12, 20, and 28. The chain spaces should stack in soft vertical columns, and the two sloping sides should remain equal. At the stated blocked gauge, Row 28 is about 28 in / 71 cm across the top and 9 in / 23 cm deep. Stop after Row 24 for a smaller scarf, or keep repeating Row 5 for more coverage. Do not ch 2 after your final body row.
- 7
Straighten the top edge before making the ties: with the RS facing you, work 1 sc into every hdc and 1 sc into every ch-1 space across the straight top edge. Count as you go; the goal is an edge that lies straight, not an arbitrary stitch total. If a chain space pulls, use 2 sc in that one space and make a note to mirror the correction on the next space only if needed.
- 8
First tie: at the left top corner, ch 80. Sc in the 2nd ch from hook and in every chain back to the corner. The return row gives the tie enough body to knot without cutting into the hair. Do not fasten off.
- 9
Picot edge: continue down the first sloping side. *Sc in the next edge space, ch 3, sl st in the first ch to make a small picot, sc in the next edge space.* Repeat to the point, then continue up the second slope. Keep the picots small and evenly spaced; they should decorate the edge, not pull it inward.
- 10
Second tie: when you reach the right top corner, ch 80, then sc in the 2nd ch from hook and in every chain back to the corner. Fasten off. Weave every tail through several solid hdc or sc bars on the WS; avoid weaving straight through open mesh spaces because the tail will remain visible.
- 11
Wet-block the finished bandana. Soak the cotton briefly, press it in a towel, and pin the point and both top corners into a symmetrical triangle. Open each mesh column gently with your fingers, then let it dry completely. Blocking is part of the lace construction: it reveals the openwork and sets the picots into an even line.
Tips for success
- Mark the two side chain spaces in Row 4. They make it much easier to see whether the mesh is widening evenly.
- If the mesh columns lean, check that you are placing hdc into the chain spaces rather than the hdc posts.
- Use a smooth yarn for this pattern. Fuzzy yarn hides the chain spaces and makes the picot edge harder to see.
- Block cotton lace to its final shape after every wash; the openwork looks smaller and less even before blocking.
Pattern at a glance
- Time to make
- One relaxed day
- Skill level
- Easy
- Hook
- 3.5 mm
- Yarn weight
- Sport-weight cotton (CYC 2)CYC standard
- Yardage
- ~175 yd / 160 m
- Gauge
- 18 mesh slots x 13 rows = 4 in / 10 cm after wet blocking
- Finished size
- About 28 in / 71 cm across the top edge and 9 in / 23 cm deep after blocking, excluding ties
Free ebook
Get new patterns, and the ebook
New patterns as they land, plus our free beginner's crochet stitch guide. No daily blasts, unsubscribe in one click.
Frequently Asked Questions
How do I make the lace bandana bigger?
Repeat Row 5 until the top width and depth suit you, then finish the top edge and ties. Every repeat adds one mesh row and widens both sloping sides, so measure the triangle flat instead of relying on a fixed row count.
Why are my lace holes leaning?
The usual cause is working into a half double crochet post instead of the next chain-one space. Undo to the first leaning row and place every mesh hdc into the open space; the columns will stack again.
Can I use DK yarn instead of sport yarn?
Yes, but use the hook that gives a drapey mesh and expect a larger, heavier bandana. Make a blocked swatch, then stop the body based on the measured top edge and depth rather than the stated row number.
Why is my picot edge ruffling?
There are too many picots for the edge length or the picots are too loose. Skip one edge space between picots, or use ch 2 instead of ch 3, and block the slope straight.