Accessories · Worked in rows
Crochet Star Stitch Bandana Pattern
By Looplader · Tested row by row · Updated
- Skill
- Intermediate
- Hook
- 4.0 mm (G/6)
- Yarn
- DK cotton (CYC 3)
- Time
- Two to three evenings
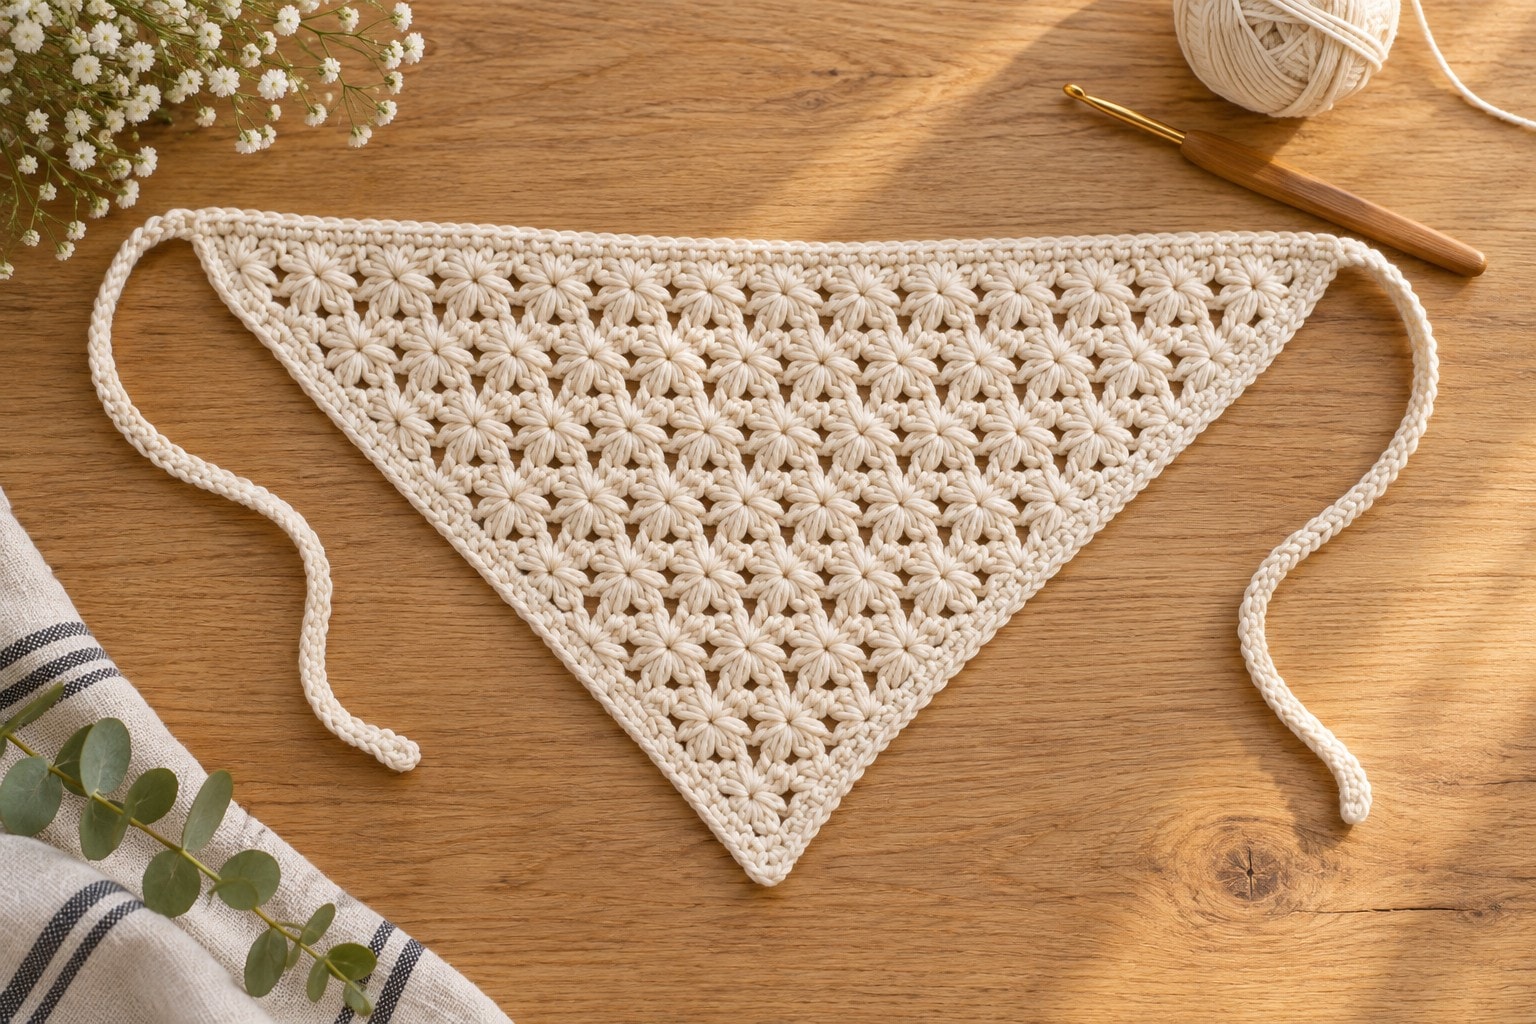
This crochet star stitch bandana is a top-down triangle worked in alternating star and half double crochet rows, with one star removed at each edge to create the point.
The dense marguerite texture needs a little room at the edges, so this version uses a loose 4.0 mm hook, checks the number of star eyes after every star row, and adds simple chained ties after the triangle is complete.
Why you’ll love this pattern
- A counted star-eye chart tells you when the triangle is narrowing correctly.
- The textured body is all one colour, so there are no colour changes or motifs to join.
- Long chain ties make the one-size triangle easy to position at the hairline.
- The single-crochet border steadies the star stitch without making the edge bulky.
Instructions
- 1
Gauge and setup: make a small star-stitch swatch over 11 stars and four rows. At the stated gauge, it should measure about 4 in / 10 cm wide and 2 1/2 in / 6.5 cm tall. Star stitch pulls inward, so change to a 4.5 mm hook if the swatch feels stiff or will not lie flat.
- 2
Foundation edge: ch 53 loosely. Hdc in the second ch from hook and in every remaining ch. (52 hdc) Turn. This straight edge becomes the bandana’s top edge; place a marker at both ends so you do not accidentally shorten it.
- 3
First star row: ch 2 and turn. Make the first star by drawing up a loop through the side of the turning chain and through the next four hdc; you now have six loops on the hook. YO, pull through all six loops, and ch 1 to make the first eye. For every following star, draw up loops through the previous eye, the side ridge of the previous star, its last base location, and the next two hdc; YO, pull through all six loops, ch 1. Work across, then hdc in the final edge space. You should have 24 star eyes and 2 edge hdc.
- 4
First shaping return: ch 1 and turn. Hdc2tog over the first edge hdc and first star eye. Work 2 hdc in each remaining eye until one eye and the last edge hdc remain; hdc2tog over those final two locations. (50 hdc) This removes one star’s worth of width across the two edges without a step in the triangle.
- 5
Repeat pair: repeat the star-row method, then the shaping-return method. Each pair removes one star eye from each side. Move your contrast markers to the first and last eye on every star row. Use the chart below to check your counts; do not continue if the two edge counts differ.
- 6
Continue the repeat pair until the final star row has 6 star eyes and 2 edge hdc. Its shaping return has 14 hdc. Fasten off after the return row, leaving a 6 in / 15 cm tail for weaving in.
- 7
Border: join yarn at one top corner. Ch 1, then sc evenly along the first diagonal, work 3 sc in the point, sc evenly up the second diagonal, and sc in every hdc across the top edge. Sl st to the first sc and fasten off. Keep the diagonal stitches relaxed; the border should follow the slope rather than pull it inward.
- 8
Ties: at one top corner, ch 70 loosely. Starting in the second ch from hook, sl st in every chain back to the corner; sl st once into the border and fasten off. Repeat at the other corner. Each tie should measure about 14 in / 35 cm after the slip stitches settle. Add or remove 10 chains for about 2 in / 5 cm of tie adjustment.
- 9
Finish: weave every tail through the underside of nearby stitches. Soak or mist the bandana, press it to the intended triangle measurements, and let it dry flat. Do not stretch the top edge; the texture should stay rounded and the point should lie centered.
| Star row | Star eyes | Following hdc return |
|---|---|---|
| 1 | 24 | 50 hdc |
| 2 | 23 | 48 hdc |
| 3 | 22 | 46 hdc |
| 4 | 21 | 44 hdc |
| 5 | 20 | 42 hdc |
| 6 | 19 | 40 hdc |
| 7 | 18 | 38 hdc |
| 8 | 17 | 36 hdc |
| 9 | 16 | 34 hdc |
| 10 | 15 | 32 hdc |
| 11 | 14 | 30 hdc |
| 12 | 13 | 28 hdc |
| 13 | 12 | 26 hdc |
| 14 | 11 | 24 hdc |
| 15 | 10 | 22 hdc |
| 16 | 9 | 20 hdc |
| 17 | 8 | 18 hdc |
| 18 | 7 | 16 hdc |
| 19 | 6 | 14 hdc |
Tips for success
- Pull the five star loops up to the same height before you close each star. Short final loops make the fabric pucker.
- Mark the first and last eye immediately after each star row. The shaping return only works when one eye is removed at each edge.
- If the triangle curves along the top edge, your turning chains or first star are too tight; remake that row with a looser hook grip.
- Block before measuring or judging fit. The hdc return rows open the star texture slightly after a gentle wet block.
Pattern at a glance
- Time to make
- Two to three evenings
- Skill level
- Intermediate
- Hook
- 4.0 mm (G/6)
- Yarn weight
- DK cotton (CYC 3)CYC standard
- Yardage
- About 165 yd / 150 m DK cotton
- Gauge
- 11 star eyes x 8 rows = 4 in / 10 cm after light blocking
- Finished size
- About 15 in / 38 cm across the top and 11 in / 28 cm deep at stated gauge, plus 14 in / 35 cm ties
Free ebook
Get new patterns, and the ebook
New patterns as they land, plus our free beginner's crochet stitch guide. No daily blasts, unsubscribe in one click.
Frequently Asked Questions
Why are my star stitches hard to work into?
The previous eye or side ridge is too tight. Pull up the final two loops of every star slightly taller before closing it, and use a hook 0.5 mm larger if the fabric still feels rigid.
Can I make this bandana larger?
Yes. Add two hdc to the foundation row for each extra star eye you want at the top, then extend the count chart upward by one star row. Keep removing one eye at each side on every return row.
Why is my triangle leaning to one side?
One edge has lost an extra eye or has a missed hdc2tog. Count the first and last eyes after every star row; they should sit at matching distances from their diagonal borders.
Can I use acrylic yarn?
You can, but smooth cotton or a cotton blend gives a lighter bandana and shows the star texture clearly. If using acrylic, swatch first because a dense star stitch can feel warmer and less breathable.