Accessories · Worked in rows
Crochet Hooded Scarf: A Poetcore Guide to Shaping, Seams & Fit
By Looplader · Project guide · Updated
- Skill
- Easy
- Hook
- Choose from your complete pattern and gauge sample
- Yarn
- Medium / worsted for the illustrated concept
- Time
- Allow separate sessions for swatching, panels, fit checks and finishing; timing depends on the chosen pattern.
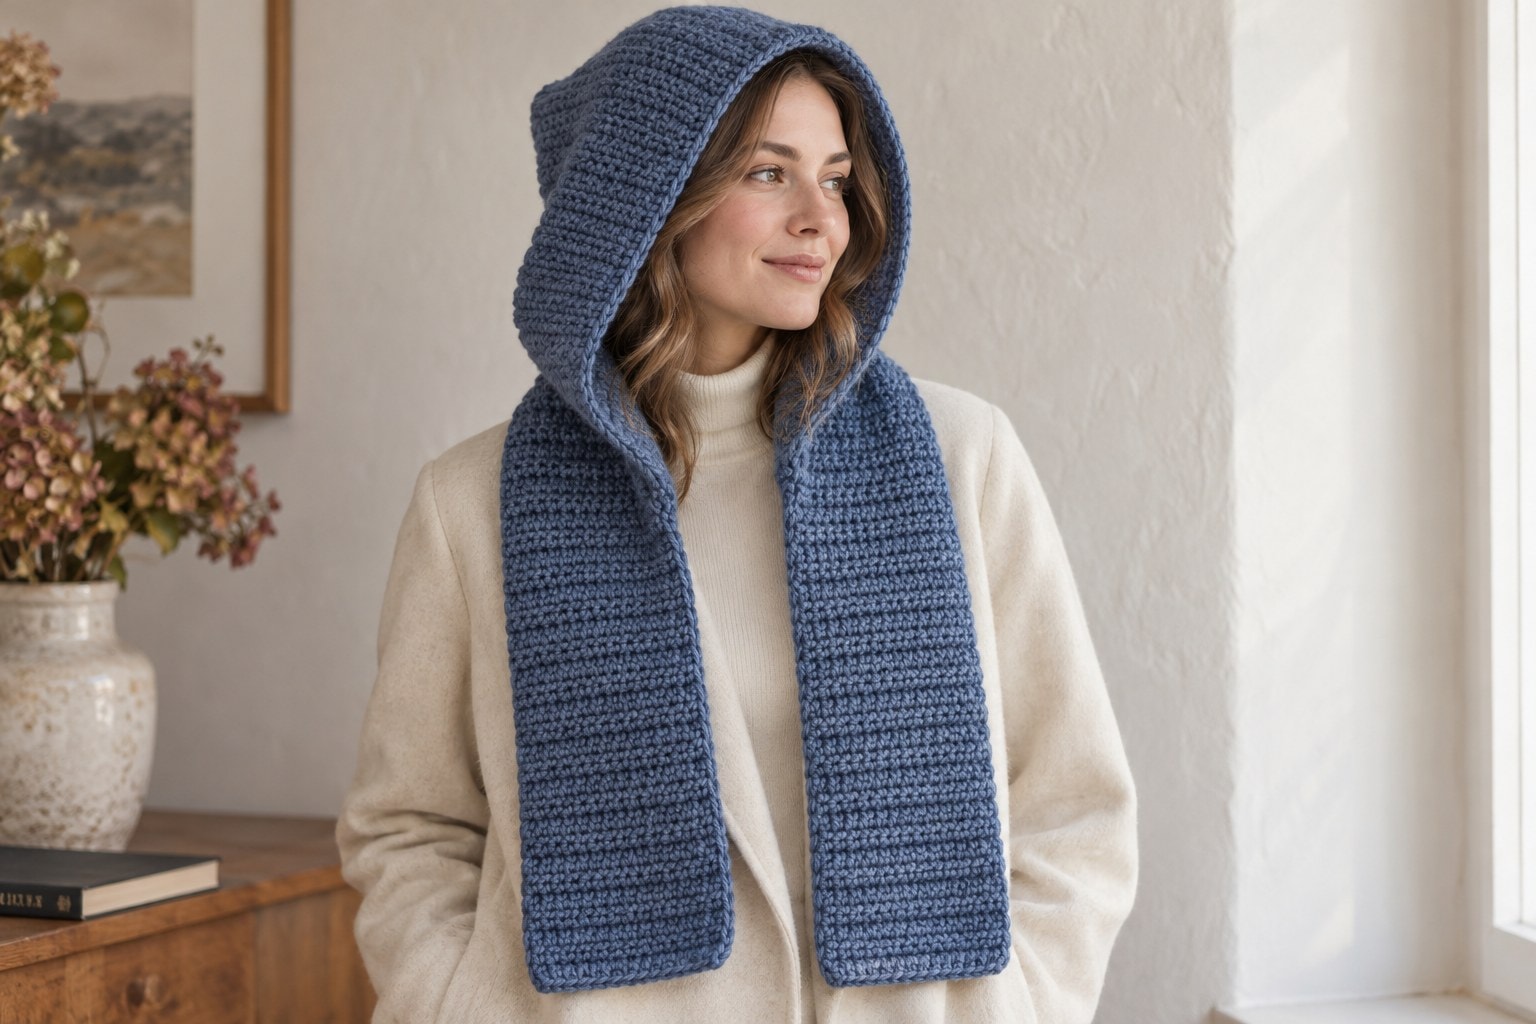
A crochet hooded scarf combines a hood with a long scarf so the head and neck can share one layer. This plain dusty-blue concept uses a separate rectangular hood panel, a crown seam and an attachment along the centre of one long scarf edge.
This guide explains construction, gauge and fit decisions, with illustrations of the design and assembly stages. Follow a complete pattern for row-by-row instructions, stitch counts and yarn quantities, and use this guide for orientation and fit checks.
Pattern, Pinterest & resources
- Pinterest Predicts: 2026 trend report
Poetcore forecast; our hooded-scarf connection is editorial interpretation, not a search-growth claim.
- Craft Yarn Council: crochet abbreviations
US crochet terms and UK equivalents.
- Craft Yarn Council: checking crochet gauge
Gauge measurement and hook-size adjustment reference (PDF).
- Craft Yarn Council: yarn-weight system
Category labels are a starting point, not a guarantee of matching fabric.
- Lion Brand: blocking methods
Choose a finishing method appropriate to the yarn and its care label.
- Wilmade: Hooded Alpa Scarf
Independent complete pattern with a joined scarf loop; different from this illustrated concept.
- Yarnspirations: Sugar Bush Hooded Cable Crochet Scarf
Free complete pattern download with cables and decorative finishing; original yarn discontinued.
- Looplader: autumn granny-square scarf guide
Another scarf construction, using motifs and visible colour changes.
- Looplader: hook and yarn converter
Reference for comparing hook-size and yarn-weight labels.
What this project includes
- Six process illustrations show the swatch, separate panels, crown fold, seam, neckline attachment and finish.
- Clear orientation checks distinguish the back fold, face opening and crown seam.
- A simple calculation helps place the hood evenly along the scarf.
- Fit troubleshooting explains which dimension to reassess before changing the edging.
Detailed project guide
- 1
Why this belongs in the poetcore conversation
Pinterest's 2026 trend report names Poetcore as a fashion direction built around a literary wardrobe: oversized turtlenecks, vintage blazers and messenger satchels. A plain crochet hooded scarf is our interpretation of that mood, especially over a simple coat. The report does not identify this particular accessory as a breakout search term, and we are not claiming measured growth for hooded-scarf searches.
The illustrated design uses dusty blue, visible rows and two open scarf ends. A narrow face edge keeps the construction easy to read. There are no pockets, ties or fringe. That leaves the practical questions in view: how deep the hood should be, where its base meets the scarf, and whether the finished fabric moves comfortably around the neck.
- 2
Choose a complete pattern with the silhouette you want
A hooded scarf has a hood attached to a scarf section. A snood usually forms a loop, while a balaclava encloses more of the head and neck. Those names overlap in shops, so look at the schematic and fastening method before choosing instructions. Open scarf tails, a joined loop and a fitted face opening need different measurements.
The resources below provide two complete alternatives. Wilmade's Hooded Alpa Scarf uses a scarf-and-hood construction with the scarf ends joined into a loop. Yarnspirations' Sugar Bush Hooded Cable Crochet Scarf uses textured cables and decorative finishing. Neither is the plain two-panel concept shown here. Read the complete selected pattern for its counts, gauge and assembly; use this guide to understand the decisions rather than mixing parts from several designs. The original Sugar Bush yarn is discontinued, so any replacement needs a fresh swatch.
- 3
Start with fabric that feels comfortable at the face
Choose a smooth yarn that lets you see the stitches and feels comfortable against your cheek. The illustrations suggest Medium, Craft Yarn Council category 4, in a wool blend, as a colour and texture reference; follow your chosen pattern's yarn requirements. Fibre blends, yarn structure and finishing can change drape even when two labels show the same category. Keep the care label with your notes.
Make the gauge sample specified by your complete pattern, using its stitch and hook. Measure a central area rather than the uneven outside edges. Check both stitches and rows over the stated distance, then finish and remeasure as directed. Craft Yarn Council recommends trying a larger hook when there are too many stitches per measured length, and a smaller hook when there are too few. Do not stop at the numbers: fold the dry fabric and check that it bends instead of standing rigidly beside the face.
- 4
Understand the two-panel construction
This concept separates the scarf from the hood. The scarf begins as a long narrow rectangle. The hood begins as a wider rectangle, which is folded side-to-side and seamed across the top. Its open base is then attached along a central section of one long scarf edge. The folded edge becomes the back of the hood; the two unjoined side edges become the face opening.
That geometry produces a gently angular crown. It does not create the rounded shape of a gusseted hood or the close fit of a balaclava. If you want either of those silhouettes, choose instructions with deliberate shaping. The process image shows the two pieces before assembly, with their midpoints aligned and a gap between them. The proportions are illustrative and cannot supply stitch counts.
- 5
Measure the hood separately from the scarf
Decide on scarf length by measuring an accessory you already wear comfortably, then consider how much of it you want to wrap. For the hood, compare a comfortable existing hood or make a loose fabric mock-up. Check base-to-crown height, front-to-back depth, and the open base length that will meet the scarf. Allow room for your usual hairstyle and the thickness of the crochet fabric.
In a simple folded rectangle, the original panel width becomes two sides of the hood: half that width lies on each side of the head. The panel height runs from the base toward the crown before seam take-up. This is a geometric description, not a fit formula. Increasing the original width changes both depth and attachment length; adding height changes crown room. Record which dimension is wrong before changing rows or stitches. A wider face border can also make the opening feel smaller.
- 6
Keep the panel edges readable
Follow your base pattern's foundation, turning-chain convention and row repeat. If it says the turning chain counts as a stitch, include it consistently; if it does not, do not accidentally work an extra stitch into it. Mark the first and last working stitches until you can identify them without guessing. Check the count at intervals and compare the panel width with the dry sample.
The plain texture in the images represents half double crochet in US terminology. Its UK equivalent is half treble crochet. The pictures are not close enough to teach exact hook placement or countable rows, so use a written stitch explanation alongside them. Avoid switching to a denser stitch merely because it looks similar: that changes gauge, weight and drape. A narrowing rectangle is a count problem to solve before seaming, not something to stretch out later.
- 7
Fold the hood and mark the crown
Lay the hood panel flat with its wider dimension running left to right. Bring the two short side edges together, folding that width in half. The fold is now at the back, while the paired loose vertical edges form the front opening. Mark the top horizontal pair of edges as the crown seam. Leave the bottom and front edges open.
Before sewing, hold the folded panel in its intended orientation or loosely baste it and try the shape. Check that the back fold sits behind the head and the top edge actually crosses the crown. If you close the front pair instead, you lose the face opening. This orientation checkpoint is useful even when the stitch work is simple. The orange markers in the illustration identify only the top seam.
- 8
Sew the crown without tightening it into a ridge
Use the seam specified by your complete pattern. Align the two top edges from the back fold to the front opening, matching corresponding stitch positions. Work a short section in matching yarn and lay it flat before continuing. The seam should hold the edges together while allowing the surrounding fabric to bend.
If the crown puckers, check for unevenly paired edges or thread pulled tighter than the crochet. If it forms a bulky ridge, examine the seam method and the loops being caught. Undo a small section and compare it before committing to the whole edge. Turn the hood to its wearing side and check the crown again. The image shows where the seam belongs; it is not an exact needle-path diagram.
- 9
Centre the hood on one long scarf edge
Mark the scarf's midpoint along one long edge. Mark the midpoint of the hood's open base at the back fold. Match those two points, then spread the rest of the hood base equally to either side along that same scarf edge. Match the two front base corners to the planned attachment endpoints. The face opening stays free above the scarf.
For planning, subtract the hood-base attachment length from the scarf's full length and divide by two. A hypothetical 170 cm scarf with a 50 cm attachment leaves 60 cm of scarf edge on each side. That figure is an unjoined edge margin, not the length of a tail hanging on a person. Seams, drape and wrapping affect the worn result. Use your actual finished measurements and confirm that the full base fits without gathering or stretching it.
- 10
Check movement before making the neckline permanent
Baste the attachment or join a short section, keeping the seam accessible. Try the hood up and down over the clothing you expect to wear. Turn your head both ways, look downward and check that the face opening stays clear. The scarf should not pull the crown backward every time the ends move. This guide is for an adult accessory; it does not provide child sizing.
If the base pulls into gathers, compare the measured attachment lengths and redistribute the join before sewing more. If the hood rides off the head, assess its depth and crown room as well as the weight of the tails. Do not shorten the face opening to disguise insufficient depth. Once placement works, finish the attachment with consistent tension and weave the ends securely into the fabric.
- 11
Finish the face edge without drawing it inward
The concept shows a narrow edging in the same blue. Follow your selected pattern's edging instructions and stitch distribution. A face opening crosses edge types, so one stitch into every visible gap is not a reliable universal rule. Mark the transition points and compare the two sides as you work.
Pause while the first pass is still easy to remove. If the opening pulls inward, there may be too few edging stitches or overly tight tension. If it flares, there may be too many. Check placement before changing hook size. Try the hood again after edging because even a small border changes the effective opening. Keep the edge away from the eyes and preserve the comfortable movement you checked before finishing.
- 12
Finish, dry and record the fit
Use the yarn label and a fibre-appropriate finishing method. Lion Brand's blocking guidance distinguishes methods by fibre; it is not permission to steam every yarn. Test the method on your swatch first. Support wet fabric, remove excess moisture gently if wet finishing is allowed, and arrange the scarf and hood without forcing them to an invented target size.
Let the accessory dry fully before measuring or assessing drape. Check the two scarf ends, crown seam, face edge and neckline. Record the dry panel measurements and any changes you made to the original pattern. A stretch imposed during blocking can disappear or distort after wear. Use the final illustration as a shape reference, and assess fit and drape on your finished scarf.
- 13
Style it as a layer you can actually wear
A plain cream coat lets the blue stitch texture show. Wear both tails open to display the long rectangle, or arrange them loosely according to the scarf's actual length and comfort. Check the hood-down position too: an accessory that sits well over the head may feel bulky behind the neck when pushed back.
For a different autumn texture, our granny-square scarf guide explores motif joins and colour planning. The hook and yarn converter can help interpret labels when comparing patterns, but it cannot select a replacement gauge for you. Keep the useful results from this project together: yarn label, swatch, dry measurements and seam notes. Those observations are a better starting point for a second version than a photograph alone.
| Full scarf length (cm) | Hood-base attachment (cm) | Margin on each side (cm) |
|---|---|---|
| 170 | 50 | 60 |
| 170 | 54 | 58 |
| 180 | 50 | 65 |
Tips for success
- Mark the crown edge before sewing; the paired front edges must stay open.
- Check the hood's depth and height separately. More height does not automatically provide more front-to-back room.
- Baste the neckline and try the hood both up and down before making the attachment permanent.
- Keep quantities tied to a complete pattern and your swatch; the illustrations cannot establish yardage.
Pattern at a glance
- Time to make
- Allow separate sessions for swatching, panels, fit checks and finishing; timing depends on the chosen pattern.
- Skill level
- Easy
- Hook
- Choose from your complete pattern and gauge sample
- Yarn weight
- Medium / worsted for the illustrated conceptCYC standard
- Yardage
- Follow your chosen pattern's quantity guidance and allow for any size changes.
- Gauge
- Measure stitch and row gauge using your selected pattern.
- Finished size
- Custom adult planning guide; table measurements are hypothetical
Free ebook
Get new patterns, and the ebook
New patterns as they land, plus our free beginner's crochet stitch guide. No daily blasts, unsubscribe in one click.
Frequently Asked Questions
Is a crochet hooded scarf suitable for beginners?
A plain version can suit a maker who can keep straight rows and sew an even seam, but the chosen pattern determines the difficulty. Cables, gussets and shaped openings add different skills. Practise the stitch and seam on a sample first, then check the hood orientation before joining it.
Why does my crochet hood keep falling backward?
Insufficient hood depth or heavy scarf tails can pull the hood backward. Check the fit with the attachment loosely basted, then compare the front-to-back depth with a comfortable hood. Tightening the face border may make the opening uncomfortable without correcting the underlying shape or weight imbalance.
How do I centre a hood on a scarf?
Match the hood-base midpoint to the scarf midpoint along one long edge, then place the attachment endpoints equally on either side. Subtract the base length from the scarf length and halve the remainder. Those equal edge margins help placement; they are not guaranteed worn tail lengths.
Is this a complete free crochet hooded scarf pattern?
This is a free-to-read construction and fit guide with process illustrations and links to complete independent patterns. Follow one complete set of instructions for counts, gauge and quantities, and use this article for orientation and checking.