Accessories · Worked in rows
Crochet Ribbed Bandana Headscarf Pattern
By Looplader · Tested row by row · Updated
- Skill
- Easy
- Hook
- 5.0 mm (H/8)
- Yarn
- Worsted or aran (CYC 4)
- Time
- One to two evenings
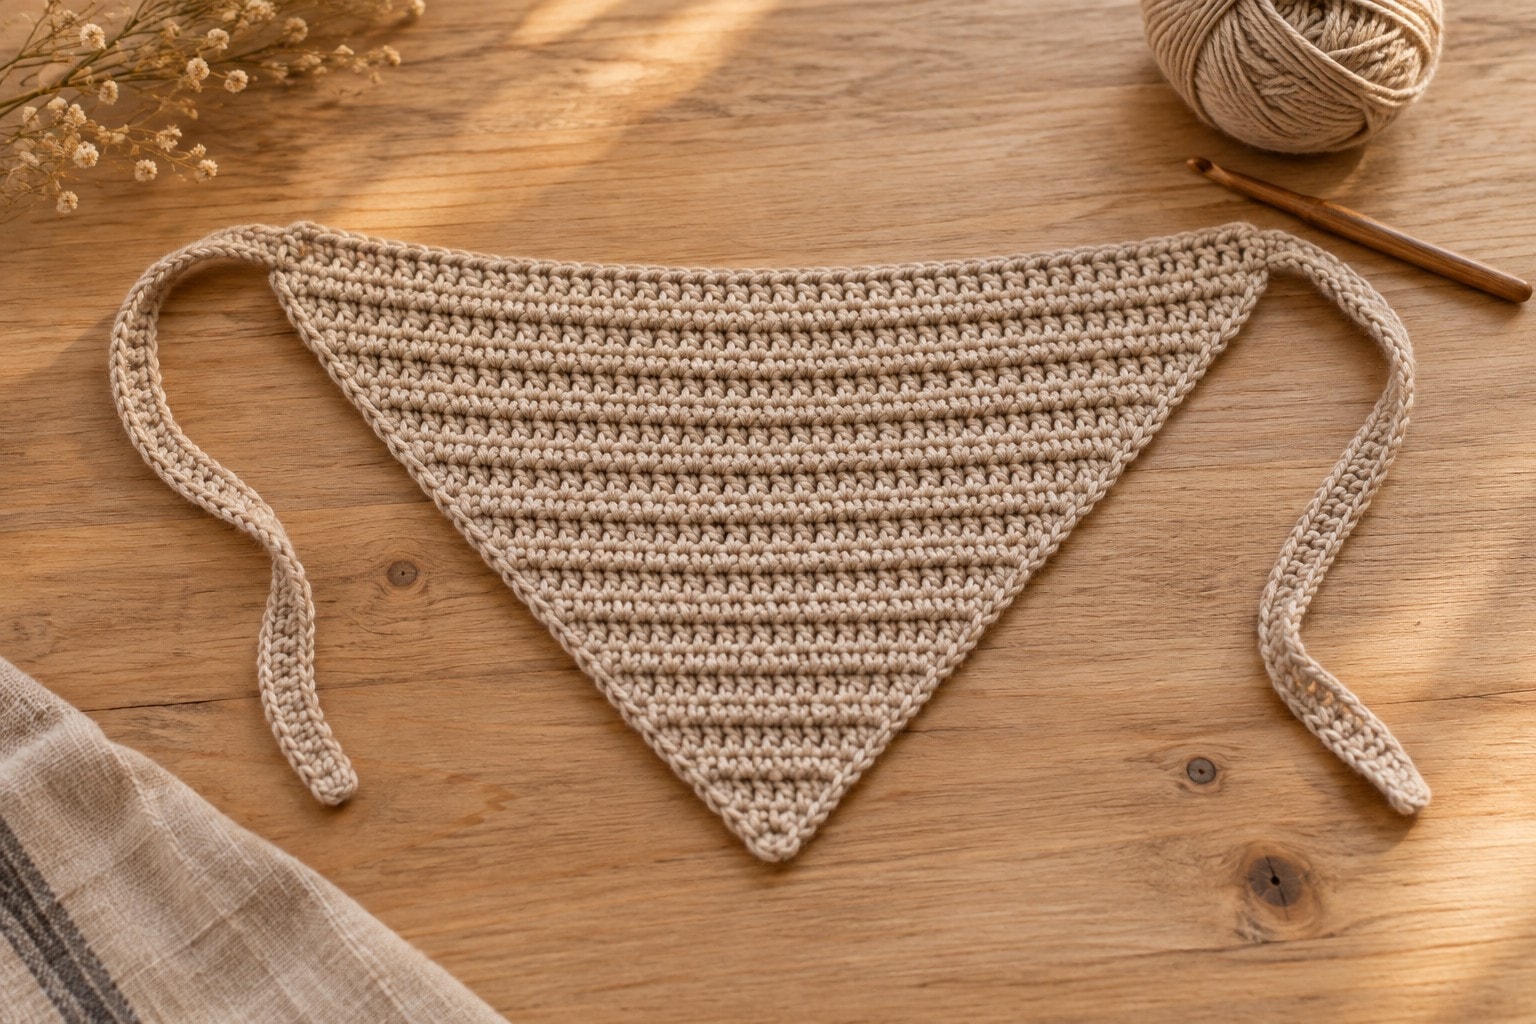
This crochet ribbed bandana headscarf is a top-down triangle made with half double crochet in the back third loop, so each row leaves a raised line of ribbing across the fabric. Two increases on every row widen the scarf evenly from the point to the tie edge.
The last row becomes a clean foundation for direct flat ties, which feel more substantial than a bare chain. The fabric is warm without being bulky, and the depth can be changed simply by adding or removing complete ribbed rows before the top edge.
Why you’ll love this pattern
- Third-loop HDC makes a pronounced horizontal rib without post stitches or extra yarn weight.
- The triangle grows from one point with a two-stitch increase on every row, so the row counts are easy to check.
- Flat ties are crocheted directly from the two top corners, with no separate pieces to sew on.
- A short, clear adjustment rule lets you set the triangle depth before adding the top edge.
Instructions
- 1
Make a third-loop HDC swatch before starting: chain 14, work one row of hdc, then work 8 more rows of 3L hdc. With the right side facing, the back third loop is the horizontal bar directly behind the top V of each hdc. The target measurements in this draft require a physical test crochet; change hook size if your ribbing feels stiff or shows large gaps.
- 2
Foundation: ch 3. Row 1: hdc in the third ch from hook. (1 hdc) Ch 1 and turn. The turning chain does not count as a stitch throughout the pattern.
- 3
Row 2: inc hdc in the only st. (2 hdc) Ch 1 and turn. This row establishes the first two top loops; work it normally, not through the third loop.
- 4
Row 3: 3L hdc inc in the first st, 3L hdc inc in the last st. (4 hdc) Ch 1 and turn. From this row onward, insert the hook under the back third loop only. On a WS row, turn the work toward you and find the same horizontal bar on the side facing you rather than working through the top V.
- 5
Row 4: 3L hdc inc in the first st, 3L hdc in each st to the last, 3L hdc inc in the last st. (6 hdc) Ch 1 and turn. The two increases must remain at the outer edges; if a rib breaks in the middle, you worked into the top V by mistake.
- 6
Rows 5-12: repeat Row 4. Counts after Rows 5, 6, 7, 8, 9, 10, 11, and 12 are 8, 10, 12, 14, 16, 18, 20, and 22 hdc. Stop after Row 12 and lay the triangle flat. The rib lines should run straight across the growing width.
- 7
Rows 13-20: repeat Row 4. Counts after Rows 13-20 are 24, 26, 28, 30, 32, 34, 36, and 38 hdc. Keep the first and last stitch markers in place until you are confident you can see the edge third loop; it is easy to lose an increase at the turn.
- 8
Rows 21-28: repeat Row 4. Counts after Rows 21-28 are 40, 42, 44, 46, 48, 50, 52, and 54 hdc. After Row 28, hold the widest edge along the back hairline to check the depth. For a shallower scarf, stop after Row 24 (46 hdc); for more coverage, add rows using the same two-increase rule before edging.
- 9
Top edge: do not turn after Row 28. Ch 1 and work sc evenly along the widest edge only, placing 1 sc in every hdc. (54 sc) This stabilizes the top edge so the ties do not pull the ribbing open. FO, leaving a 5 in / 13 cm tail to weave in.
- 10
Left tie: attach yarn at the left end of the top edge with the right side facing. Ch 58. Sc in the second ch from hook and in every remaining ch back to the corner. Sl st into the corner sc and FO. The return row makes a flat tie that is less likely to twist than a single chain.
- 11
Right tie: attach yarn at the right end of the top edge and repeat the left tie exactly. Try the scarf on before weaving the final ends; if you want more wrap, add chains to both ties in equal amounts. Do not lengthen only one tie or the triangular point will sit off center.
- 12
Weave each tail through the wrong side of several ribbed rows without pulling them tight. Lightly block only if your yarn label allows: pin the top edge straight, let the point hang naturally, and avoid stretching the ribbing sideways. The goal is to settle the edges while preserving the spring of the third-loop texture.
- 13
Wear the finished bandana with the point centered at the nape and the top edge following the hairline, then tie the flat cords comfortably beneath the hair. For a scarf-style look, rotate it so the point sits at the front of the neck. The same construction works either way, but the back-of-head placement shows the ribbing most clearly.
| After row | Stitch count | What to check |
|---|---|---|
| 4 | 6 hdc | Both side increases sit at the outer edges |
| 12 | 22 hdc | Ribs are parallel and the point remains centered |
| 20 | 38 hdc | Triangle lies flat without curling edges |
| 28 | 54 hdc | Try depth at the back of the head before edging |
Tips for success
- On every row, locate the third loop before making the first increase. Once you see the unused top V staying on the surface, you know you are entering the correct horizontal bar.
- Keep the turning chain loose but do not count it as a stitch. Working into it adds one stitch only on one side and creates a lopsided triangle.
- If the ribbing feels stiff, go up one hook size before adding more rows. If the ribs look loose and uneven, go down a hook size rather than pulling your yarn tighter.
- Use the same chain count for both ties. An uneven tie length shifts the point off center even when the triangle itself is perfectly symmetrical.
Pattern at a glance
- Time to make
- One to two evenings
- Skill level
- Easy
- Hook
- 5.0 mm (H/8)
- Yarn weight
- Worsted or aran (CYC 4)CYC standard
- Yardage
- Estimated: ~130 yd worsted yarn; allow extra for gauge differences
- Gauge
- Estimated: 13 hdc x 10 rows = 4 in / 10 cm in third-loop HDC; confirm by test crochet
- Finished size
- Estimated: 17 in / 43 cm across top and 10 in / 25 cm deep before ties; check against your gauge and finished measurements
Free ebook
Get new patterns, and the ebook
New patterns as they land, plus our free beginner's crochet stitch guide. No daily blasts, unsubscribe in one click.
Frequently Asked Questions
Where is the third loop of a half double crochet?
With the right side facing, it is the horizontal bar directly behind the top V made by the prior row’s half double crochet. Insert under that bar only; leave the two top loops unworked so they form the raised rib on the fabric surface.
Why are my ribs disappearing?
You are probably working into the normal top V instead of the third loop. Undo one or two stitches, rotate the fabric so the back horizontal bar is visible, and rework the row through that bar only. The top V should stay unworked.
How do I make this ribbed bandana deeper?
Add more rows using the same two-increase rule, then edge the widest side and add the ties. Each extra row adds two stitches across the top edge and one additional rib line. Recheck the fit every four rows.
Can I use bulky yarn?
Yes, but make a new swatch and stop earlier. Bulky yarn makes a much larger, warmer triangle with the same stitch counts, and the ribbing can become stiff if the hook is too small. Match the fabric feel, not the row total.