Baby & Nursery · Worked in rows
Crochet Baby Bandana Bib Pattern
By Looplader · Tested row by row · Updated
- Skill
- Easy
- Hook
- 3.5 mm (E/4)
- Yarn
- DK (CYC 3) cotton
- Time
- An evening
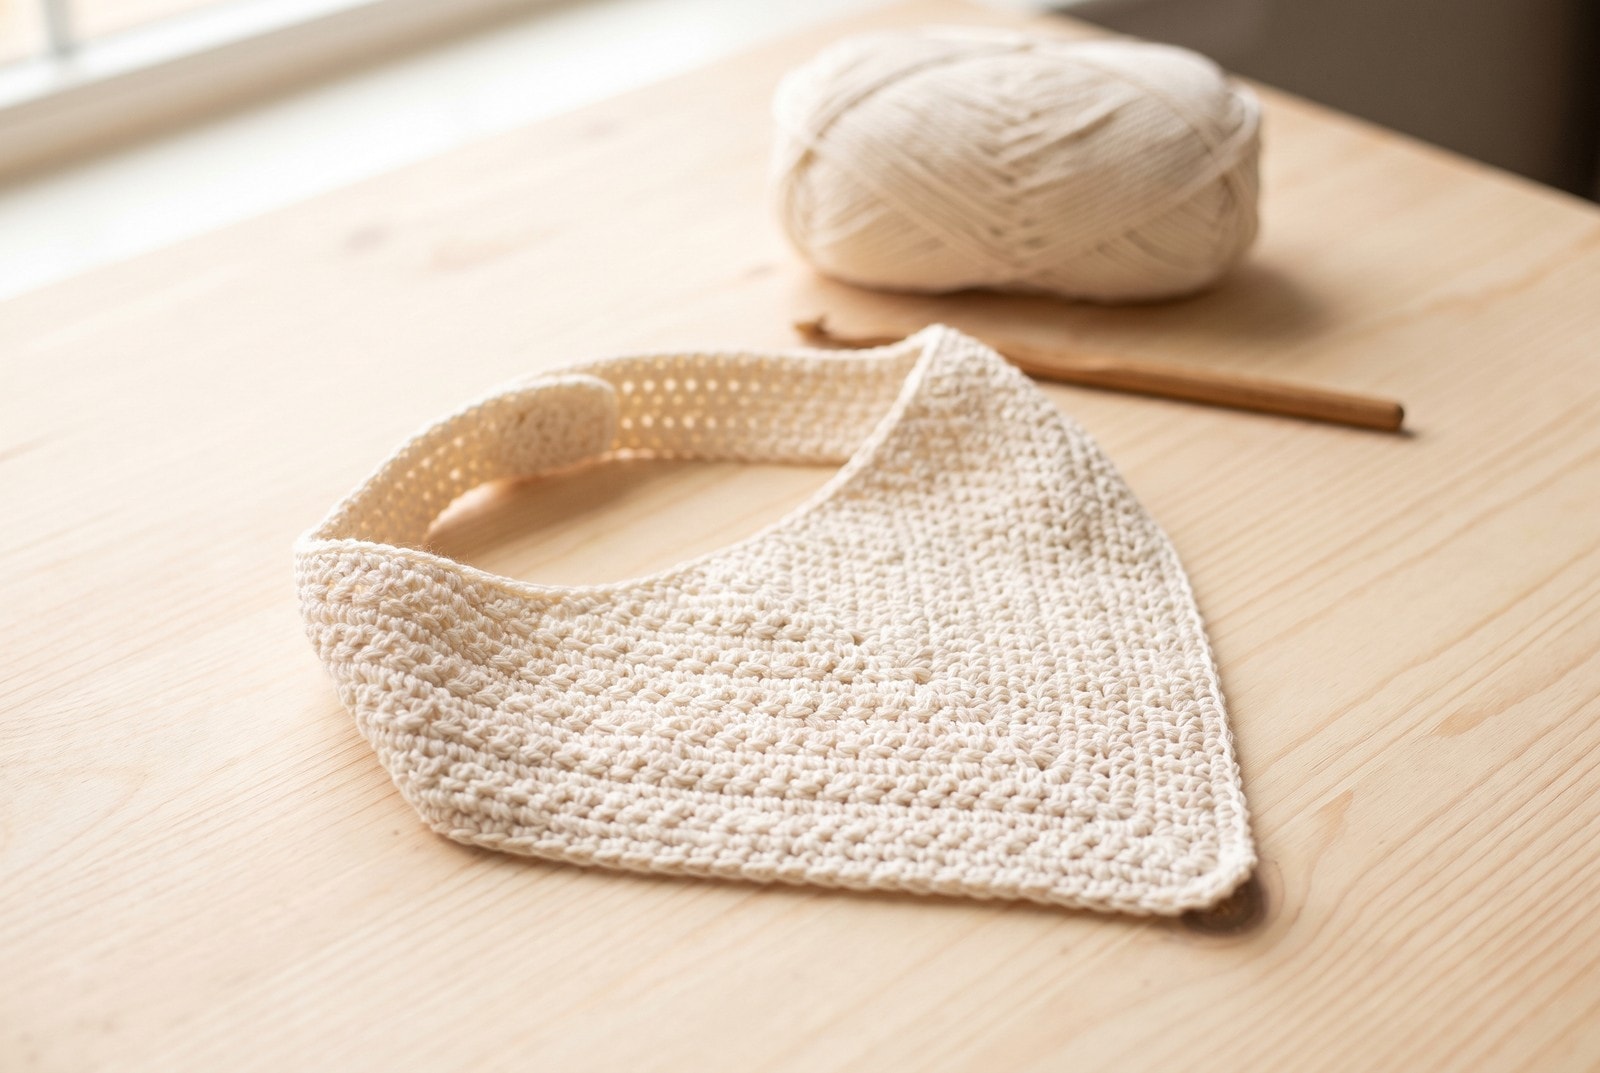
This bandana bib is worked flat in two stages: a straight neckband first, then a triangle worked down from the middle of that band, so the two are one piece and there is no seam across the neck edge where a drool bib gets the most wear.
The closure is the part worth reading twice. Instead of a snap or a sewn-on button, two bobbles are worked directly into the neckband and a chain loop drops over whichever one fits. Nothing is attached, so nothing can be pulled off.
Why you’ll love this pattern
- The button is a bobble worked into the band itself — no snaps, no sewn-on hardware.
- Two bobble positions give about 1¼ in of neck adjustment as the baby grows.
- One 50 g skein of DK cotton finishes the 0-6 month size with yarn left over.
- Band and triangle are worked as one piece, so the neck edge has no seam to fray.
Instructions
- 1
Check gauge before you start. Work a swatch at least 5 in square in sc with the 3.5 mm hook. You are aiming for 18 sc x 20 rows = 4 in / 10 cm. Gauge is what decides whether the neckband fits, so measure it flat without stretching: if your swatch runs wide, drop to a 3.25 mm hook. Two sizes are written throughout — 0-6 months first, 6-18 months in brackets.
- 2
Neckband. Ch 54 (ch 62). Row 1: sc in the 2nd ch from the hook and in each ch across. (53 sts / 61 sts) Ch 1 and turn.
- 3
Row 2: sc in each st across. (53 sts / 61 sts) Ch 1 and turn. Turn the work so the wrong side faces you for the next row — a bobble pops out on the side away from you as you make it, so working it from the wrong side puts both bobbles on the outside of the finished bib.
- 4
Row 3 (WS): sc in the first 3 sts, bo in the next st, sc in the next 5 sts, bo in the next st, sc in each remaining st across. (53 sts / 61 sts, with two bobbles sitting 4 and 10 sts in from the right-hand edge) Do not turn and do not fasten off.
- 5
Buttonhole loop. Still at the end of Row 3, ch 6, then sl st back into the last st you worked to close the chain into a loop. Fasten off and weave the tail into the band. The loop drops over the far bobble for the smaller neck setting and the near bobble as the baby grows.
- 6
Mark the triangle. Lay the band flat with the bobbles at the right-hand end and the long lower edge toward you. Count 11 sts (12 sts) in from the left-hand edge and place a marker in that stitch. Count 31 sts (37 sts) along from the marker and place the second marker in the last of them. Everything between and including the two markers becomes the top of the triangle; the plain spans left at each end are what wraps around the neck.
- 7
Triangle Row 1 (RS): with the right side facing, join yarn in the first marked st on the lower edge of the band. Ch 1, sc in that st and in each st across to the second marker, including it. (31 sts / 37 sts) Ch 1, turn.
- 8
Row 2 (WS): sc in each st across. (31 sts / 37 sts) Ch 1, turn.
- 9
Row 3 (RS, decrease): sc2tog, sc in each st across to the last 2 sts, sc2tog. (29 sts / 35 sts) Ch 1, turn.
- 10
Rows 4-29 (Rows 4-35): repeat Rows 2 and 3 in order — one plain row, then one decrease row — 13 more times (16 more times). Each decrease row takes off 2 sts, one at each end, which is what forms the two clean diagonal edges. Checkpoint: after the last decrease row you should have 3 sts left, and the triangle should measure about 5¾ in / 14.5 cm (7 in / 18 cm) from the band down to the last row. If the count is right but the triangle is short, your row gauge is tight — the bib still works, it will just sit a little higher on the chest.
- 11
Row 30 (Row 36): sc3tog. (1 st) Cut the yarn, pull the tail through the last loop and tighten.
- 12
Edging. With the right side facing, join yarn at the base of the band where the first diagonal edge begins. Sc evenly down that edge to the point, work 3 sc into the point stitch, then sc evenly up the second diagonal edge to the band. Work about 2 sc for every 3 row-ends — enough to hold the edge flat without ruffling it. Sl st into the base of the band and fasten off.
- 13
Finishing. Weave every end into the wrong side of the dense band or triangle fabric rather than along the edging, and trim close. Turn the bib over and run a hand across the inside: anything that catches your finger will catch a baby's, so tack down or trim any loose loop. Block it flat by wetting it, pressing it to shape on a towel and letting it dry fully — cotton relaxes on the first wash, and blocking now tells you the real finished size.
| Size | Foundation ch | Band sts | Triangle top sts | Marker inset | Decrease rows | Finished (w x d) |
|---|---|---|---|---|---|---|
| 0-6 months | 54 | 53 | 31 | 11 sts | 14 | 7 x 6¼ in / 18 x 16 cm |
| 6-18 months | 62 | 61 | 37 | 12 sts | 17 | 8¼ x 7¼ in / 21 x 18.5 cm |
Tips for success
- Work the neckband at a slightly tighter tension than the triangle. The band carries all the pull, and a loose band stretches over a few washes until the bib hangs low.
- Count your stitches at the end of every decrease row rather than every few rows. A missed decrease shows up as a kink in the diagonal edge, and by the time you notice it you are unpicking ten rows, not one.
- Skip the fabric softener when you wash it. It coats cotton fibres and cuts the absorbency, which is the whole reason to use cotton for a drool bib.
- For a thicker bib for a heavy teether, hold the DK cotton double and go up to a 5.0 mm hook — work the smaller size, since doubling adds about an inch across the top.
Pattern at a glance
- Time to make
- An evening
- Skill level
- Easy
- Hook
- 3.5 mm (E/4)
- Yarn weight
- DK (CYC 3) cottonCYC standard
- Yardage
- About 95 yd / 87 m (0-6 months); about 130 yd / 119 m (6-18 months)
- Gauge
- 18 sc x 20 rows = 4 in / 10 cm in single crochet
- Finished size
- 0-6 months: 7 in / 18 cm across the top by 6¼ in / 16 cm deep including the band. 6-18 months: 8¼ in / 21 cm by 7½ in / 19 cm.
Free ebook
Get new patterns, and the ebook
New patterns as they land, plus our free beginner's crochet stitch guide. No daily blasts, unsubscribe in one click.
Frequently Asked Questions
Is a crocheted bobble really safe as a baby bib closure?
Yes, and it is safer than a sewn-on button or a snap. The bobble is worked from the same continuous strand as the band around it, so there is no separate part and no stitching that can work loose. A snap has a prong set through the fabric that can pull free, which is the exact failure the no-sewn-parts rule exists to prevent.
Can I use acrylic yarn instead of cotton?
You can, but it will not absorb. Acrylic sheds moisture rather than soaking it up, so a drool bib in acrylic stays wet on the surface and against the baby's chin. Use plain or mercerised 100% cotton, or a cotton-bamboo blend, and keep it machine washable — this gets washed after every meal.
How do I make the neck bigger without redoing the pattern?
Add stitches to the foundation chain in multiples of 4, which is about 1 in of neck for every 4 chains at this gauge. Add half the extra to your first marker count so the triangle stays centred. The triangle itself does not change at all.
Why is my triangle's edge wavy instead of straight?
You are almost certainly working the decrease into the wrong stitch on turning rows. The sc2tog has to consume the first two stitches of the row, not the turning chain and the first stitch, which leaves an extra loop at the edge every time. If your stitch count is right but the edge ripples, decrease placement is the cause.