Baby & Nursery · Mixed construction
Pumpkin Patch Crochet Baby Cardigan: A Detailed Halloween Guide
By Looplader · Project guide · Updated
- Skill
- Intermediate
- Hook
- Use the complete pattern’s hook, adjusted to meet its gauge.
- Yarn
- Light / DK for the illustrated concept; match the chosen pattern.
- Time
- Several making sessions plus swatching and drying; no timed sample has been completed.
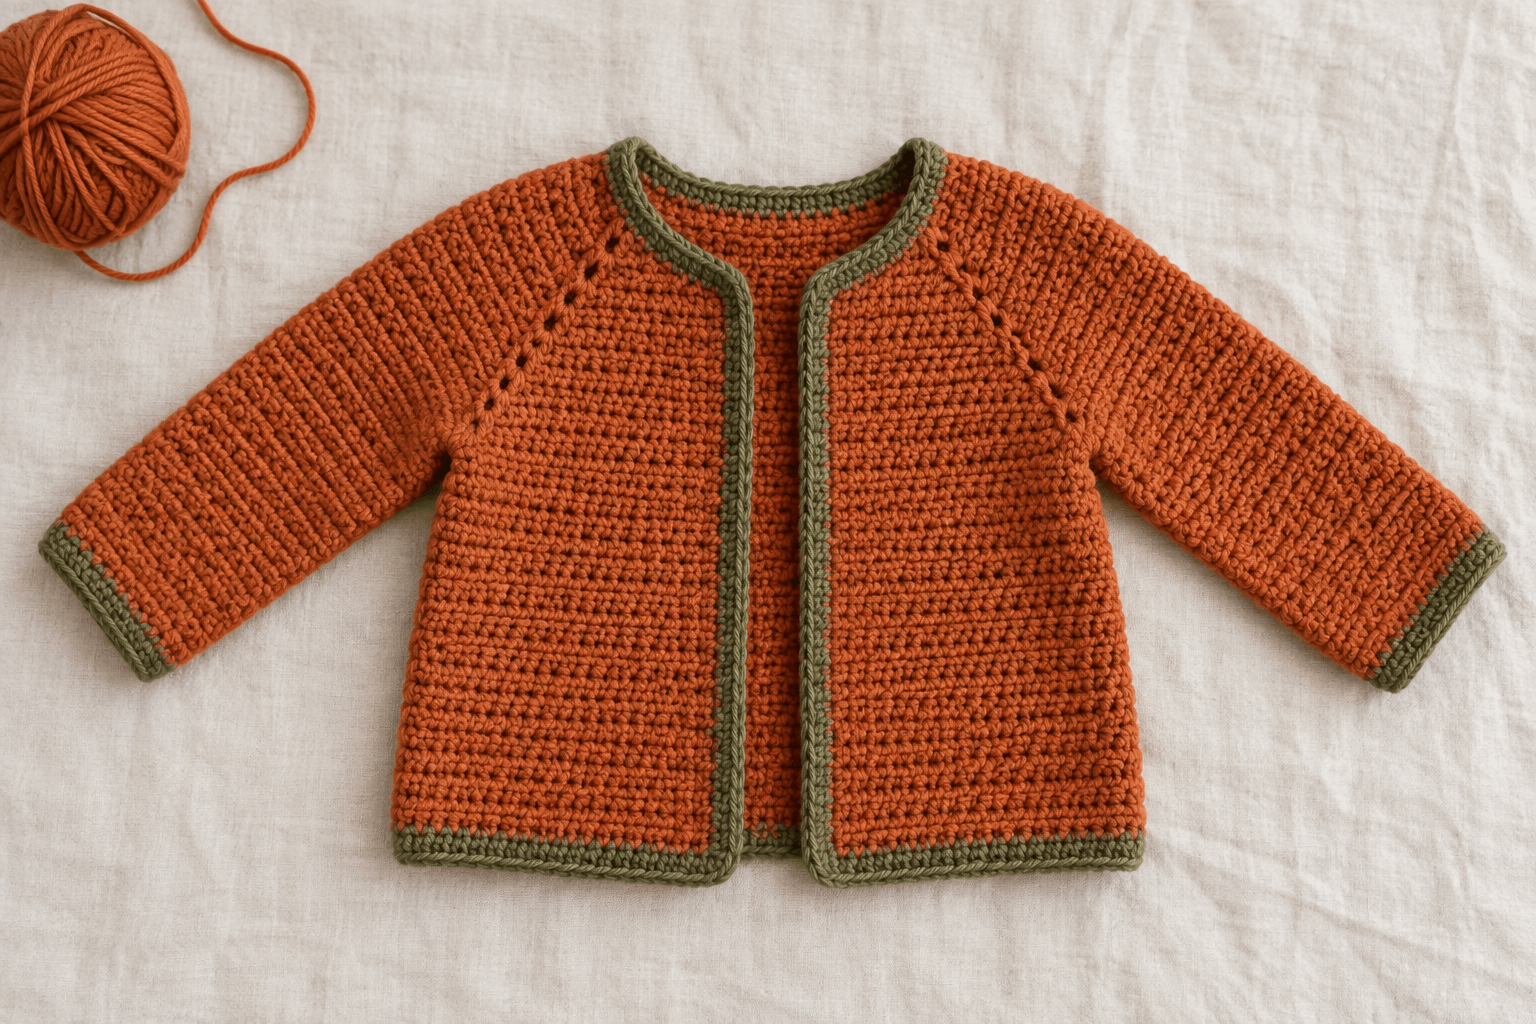
A pumpkin patch crochet baby cardigan brings Halloween colour to an everyday garment: an orange raglan body, long sleeves and narrow olive edging. This guide follows a top-down, open-front concept from the first gauge sample through sleeve separation and finishing.
This construction guide covers shaping, fit checks and finishing, with illustrations of the pumpkin colour concept and assembly process. Use a complete, size-specific pattern for foundation counts, shaping and yarn quantities. The numerical examples below explain calculations rather than prescribe a baby size.
Pattern, Pinterest & resources
- Baby size chart — Craft Yarn Council
Body measurements, including the 43 cm six-month chest reference; not finished garment sizes.
- Body sizing — Craft Yarn Council
Distinguishes body measurements, finished dimensions, ease and schematic reference points.
- Crochet gauge — Craft Yarn Council
Measure the specified stitch with the selected yarn and hook.
- Yarn weight system — Craft Yarn Council
Light / DK classification; not a substitute for pattern-specific gauge.
- Crochet abbreviations — Craft Yarn Council
Reference for US crochet terminology.
- Scattered Dot Baby Sweater — Daisy Farm Crafts
Independent shaped-yoke garment with texture; not the exact illustrated concept. Its counts are not reproduced.
- Bobbly Baby Cardigan — Yarnspirations
Independent complete cardigan resource with its own sizing and finishing requirements.
- Halloween safety — American Academy of Pediatrics
Costume fit, catching hazards and flame-resistance labelling guidance.
What this project includes
- A garment project distinct from the pumpkin hat, booties and candy corn blanket guides.
- Eight process illustrations covering the swatch, yoke, armholes, sleeves and finishing.
- Separate checks for chest width, yoke depth and sleeve fit.
- Halloween colour without dangling ties, attached ornaments or a bulky hood.
Detailed project guide
- 1
Start with the garment, then add the Halloween palette
The pumpkin effect comes from two colours, not from a costume attachment. Keep the torso and both sleeves orange, then use olive for a narrow, flat edging. A plain surface makes the yoke lines and sleeve shape easier to see. It also keeps the project useful after October: the same silhouette can become an autumn cardigan without changing its construction.
The illustrated version has an open front, a rounded neckline and no closure. That choice must be compatible with the base pattern. If its fronts are designed to overlap under a button band, simply removing the buttons does not turn it into the same silhouette. Choose an open-front pattern or keep the original designer’s closure and describe that as a different variation. The following stages explain the raglan route; they do not convert every cardigan pattern into one.
- 2
Choose a complete pattern with a useful schematic
Look for a top-down cardigan pattern that states finished chest measurement, yoke depth, body length, upper-sleeve circumference and sleeve length. A photograph and an age label do not supply enough information to judge a garment. Check whether the sleeves are worked in rounds or flat and seamed, whether the front bands add width, and whether gauge is measured before or after washing.
The independent cardigan resources at the end illustrate different solutions. Daisy Farm Crafts’ Scattered Dot sweater uses a shaped yoke and a textured fabric; Yarnspirations’ Bobbly Baby Cardigan is another complete garment resource. Neither is the exact orange-and-olive concept shown here, and their counts are not reproduced. Follow one complete pattern consistently rather than combining one designer’s neckline with another’s sleeve split. Where a source does not state a detail you need, resolve that before starting the garment.
- 3
Select yarn for fabric, not just colour
Choose orange and olive from a compatible yarn range when possible. Compare fibre content, recommended care and metres per ball as well as the weight category. The Craft Yarn Council classifies DK within Light, category 3, but yarns in that category still vary in density and behaviour. A smooth yarn makes a first raglan project easier to count than a fuzzy or heavily textured one.
Work both colours into the sample. Check whether the olive changes the stiffness of the border and whether either colour transfers during the label-permitted wash. A dense fabric that looks attractive on a table may feel too firm for a little sleeve; a very loose sample may grow after washing. Judge the dry fabric in your hands. Keep the labels with the project so the eventual care instructions refer to the actual yarn, not to a generic fibre assumption.
- 4
Measure the sample before choosing a size
Make a swatch larger than the measuring window using the exact stitch and working method specified in the base pattern. Count across an interior area, away from the starting chain and turning edges. Record stitches across and rows vertically, then wash and dry the sample according to its label. Measure again without stretching it. If the sleeves use a different working method, check that fabric too.
For an arithmetic example only, suppose a dry 10 cm window contains 20 stitches and 22 rows. That is 2 stitches and 2.2 rows per centimetre. A 24 cm stretch of plain fabric would use about 48 stitches at that gauge. A 12 cm vertical section would require about 26.4 rows, so the pattern’s shaping and repeat rules determine a workable whole-row choice. These numbers are not a cardigan size. The Craft Yarn Council’s gauge sheet explains why the specified yarn, hook and stitch matter.
- 5
Keep body measurements separate from garment measurements
The Craft Yarn Council baby chart lists body measurements. Its 6-month chest reference is 43 cm; that is not a finished cardigan circumference and not a promise that every six-month-old measures the same. Compare the intended wearer, or a suitable garment that already fits, with the chosen pattern’s finished schematic. Account for the intended layer underneath and the designer’s stated ease.
As a planning example, a hypothetical 43 cm body chest plus a deliberately assumed 5 cm of ease gives 48 cm. The 5 cm is an example, not a universal baby-garment recommendation. With an open-front cardigan, do not silently add the visible front gap to the crocheted fabric width or count overlapping bands twice. Follow the schematic’s measurement convention. Check upper arm and neckline independently; a correct chest does not guarantee comfortable sleeves or a suitable neck opening.
- 6
Map the yoke before working the foundation
A raglan yoke divides into five fabric regions: one front, one sleeve, the back, the other sleeve and the other front. Four raglan boundaries separate those regions. Draw that sequence in your notebook and copy the base pattern’s allocation beside it. Mark which side faces outward and whether the turning chain counts as a stitch.
Make the specified foundation, work its first row and count before placing the four raglan markers. Use a second marker colour at the first and last actual stitches if the row edges are difficult to recognise. A row that is short at this point will not become correct when the yoke expands. Check the foundation tension as well: if it pulls the neckline inward while the next rows lie comfortably, remake it using the pattern’s suggested foundation adjustment rather than stretching the chain aggressively later.
- 7
Audit raglan increases without borrowing a size
Raglan shaping is easier to check when each increase has an explicit net effect. In one common example, three stitches replace one marked stitch. That corner adds two stitches; four such corners add eight across an increase row. A hypothetical row of 60 stitches would therefore become 68, then 76 after a second identical increase row. This calculation is a counting lesson, not a foundation instruction for this cardigan.
Other patterns use chain spaces or different increases, so do not apply the eight-stitch rule without reading their stitch definitions. After each increase row, count the five regions as well as the total. A correct overall total can hide a misplaced increase that made one sleeve wider and one front narrower. Move each marker into the new location specified by the pattern. Record straight rows separately so they are not accidentally treated as increase rows.
- 8
Check width and depth before separating sleeves
Lay the yoke down without pulling its corners outward. Measure its depth using the same reference points as the schematic, then check the front, back and sleeve portions. Compare both sides. A small difference in how the fabric is folded can look like an uneven yoke, so align the neckline and front edges before deciding there is a shaping error.
More increase rows add both width and depth; they are not a universal fix for every fit problem. If the yoke is deep enough but too narrow, or wide enough but too shallow, recheck stitch gauge and row gauge separately. Use a different graded size or a designer-supported adjustment when necessary. An underarm chain may add width, but it cannot repair an incorrectly placed shoulder line or a neck opening that already fits badly. Resolve those issues while the yoke is still accessible.
- 9
Separate the body from the sleeve openings
At the split row, work the first front, bridge the first underarm as instructed, skip the designated sleeve stitches, work the back, bridge the second underarm, skip the second sleeve portion and finish the remaining front. The body stays open across the centre front. The held sleeve stitches become the upper edges of two armholes; they are not worked into the body row.
Count the body immediately after the split. An illustrative allocation of 22 front stitches, 44 back stitches, 22 other-front stitches and two bridges of 4 stitches gives 22 + 44 + 22 + 4 + 4 = 96. This example assumes those regions already account for all raglan boundary stitches. Real instructions may allocate the corner stitches differently. Check that detail rather than adding a guessed extra stitch at each junction. Compare the two openings before building the torso beneath them.
- 10
Keep the torso straight and the fronts balanced
Once the sleeves are separated, the illustrated concept continues in plain orange rows. Follow the base pattern’s stitch and turning-chain rules. Mark the first and last actual stitches, count at sensible intervals and measure the width at more than one height. A gradually widening front often signals an extra stitch worked into a turning chain; a narrowing one may come from skipping the final stitch.
Measure body length from the underarm if that is the schematic’s reference, not from the neckline. Stop short of the final length by the amount reserved for the hem edging. For example, a hypothetical 15 cm underarm-to-hem target with a 1 cm finished trim leaves 14 cm for the body below the split. This is only a planning calculation. Both front edges should reach the hem at the same row, and the lower edge should lie straight before any contrasting yarn is added.
- 11
Join the first sleeve and check the underarm
Join orange yarn at the underarm location given in the pattern. Work around the held sleeve stitches and into the specified part of the underarm bridge. The sleeve uses the other side of that bridge from the body, so identify the available loops carefully. Avoid inserting the hook into an arbitrary loose strand simply because it appears to fill a gap.
Count the first sleeve round and record the result before continuing. Junctions can leave a small hole; a pattern may close it with a planned pickup or decrease, or leave a tail for a discreet finishing stitch. Do not add several extra stitches without reconciling the total. That can make a bulky underarm and disrupt tapering. Mark the beginning of the round. If the pattern uses joined, turned rounds, keep both the join and the turn; changing to a spiral can change the fabric’s appearance and gauge.
- 12
Match the two sleeves with a written record
Record the first sleeve’s starting count, each decrease round, straight rounds, length before edging and final cuff count. Use the same record for the second sleeve rather than copying its appearance by eye. The in-progress illustration shows one sleeve finished in orange and the second only partly worked; their unequal lengths indicate the sequence, not the finished design.
For another arithmetic exercise, 40 starting stitches reduced by two single-stitch decreases on each of four decrease rounds gives 40 − 2 × 4 = 32 stitches. A single sc2tog reduces the total by one, not by two. The example says nothing about the spacing of those rounds or a suitable wrist size. Take those from the complete pattern. Compare the sleeves after laying them flat in the same orientation; do not stretch the shorter one to make the pair appear equal.
- 13
Check the cuff opening before adding contrast
A cuff must accommodate the hand as well as the wrist. Compare the dry opening, the fabric’s natural give and the size-specific pattern guidance before making a firm border around it. Do not assume that a narrow cuff is acceptable because it stretches under a strong pull. If the planned edge restricts the opening, correct the sleeve count or use the base pattern’s supported alternative.
Reserve the cuff depth when measuring sleeve length. Work the same number of olive edging rounds on both sleeves unless the complete pattern intentionally says otherwise. Keep the join placement consistent. If one cuff is noticeably tighter, compare tension and count before adding more rounds. A change of hook for an edging sample can be useful, but record it so the second cuff is made the same way. The concept uses a plain flat edge, not a drawstring or a folded decorative cuff.
- 14
Sample the orange-to-olive transition
Practise the colour join on the gauge piece before working it on the cardigan. When a change is made at the end of a single crochet stitch, the final pull-through can use the new colour so the next stitch begins in olive. If the border starts with a fresh join in a different location, use the joining method in the base pattern instead; those are different situations.
Keep the old and new tails long enough to weave securely through their own colour areas. A tight pull at the change can make a dent, while a loose working loop can leave a visible hole. Spread the sample gently and inspect both faces. Do not carry an unused orange strand around the full olive border by default: it adds bulk and may show through. The finished contrast should be narrow and even, not a thick rope that holds the front edges rigid.
- 15
Work the front edging without ruffles
Start at the pattern’s designated point and distribute the olive pickups evenly along each front. Row ends and horizontal stitch tops are different edges, so one pickup in every visible opening is not automatically correct. Follow the pattern’s distribution, then check a short section laid flat. Too many pickups can ripple; too few can draw the edge inward. Tension can produce similar symptoms, so compare count and gauge before deciding what to change.
At each lower front corner, use the stated corner treatment so the edging turns without bunching. The process illustration shows a narrow olive edge continuing from the front around the hem. Keep the corresponding corner on the other side symmetrical. When the border reaches the neck, confirm that it does not pull the opening upward or make it stand stiffly. Finish the specified border circuit or rows without inventing button loops for an intentionally open-front garment.
- 16
Inspect the garment from the inside
Turn the cardigan inside out and look at the underarm junctions, colour joins and sleeve joins. Weave each tail through several nearby stitches on the wrong side, following the yarn path without pulling the fabric into a pucker. Change direction to help anchor the end, then gently flex the area and check it again. Very slippery yarn may need a different finishing method from a grippy wool blend; test the chosen method on the sample.
If an underarm gap remains, close it discreetly using neighbouring sound stitches rather than cinching the entire opening into a knot. Avoid an interior loop that could catch a finger. Inspect all joins after handling the cardigan. Do not use glue as a substitute for a sound yarn finish. Remove every temporary marker before the garment is worn, and keep loose needles, pins and scissors away from the finished item.
- 17
Wash, dry and measure the actual result
Use the care method permitted by both yarn labels. If the colours require incompatible treatment, that should have been caught in the swatch stage; choosing the harsher treatment at the end is not a solution. Support wet fabric when moving it and arrange the cardigan on the appropriate drying surface without stretching the sleeves or front bands into a new size.
When fully dry, measure again: body width using the schematic’s convention, yoke depth, underarm-to-hem length, sleeve length, upper sleeve and cuff opening. Compare left and right. Record the actual result rather than presenting the pre-wash measurement as final. The illustration shows the finished orange cardigan on a towel, with the olive edge lying flat. It is a visual reference for the arrangement, not evidence that this concept has been physically made or checked against a baby.
- 18
Use the Halloween theme without adding loose decorations
The orange-and-olive palette is enough to identify the pumpkin theme. The illustrated concept deliberately leaves out tassels, neck cords, dangling leaves, glued eyes and small decorative pieces. Those additions would introduce separate attachment and suitability questions while doing nothing to improve the cardigan’s fit. A plain front also makes washing and inspecting the fabric easier.
For Halloween outings, follow the American Academy of Pediatrics’ advice to check costume fit and avoid pieces that catch on objects. Do not describe a handmade cardigan as flame-resistant unless there is evidence for that claim. Keep it away from candles and other flames. Assess the clothing layers and conditions for the individual child rather than treating a yarn name as a warmth rating. This project is an ordinary supervised daytime layer, not a certified costume or a sleepwear design.
- 19
Troubleshoot the stage where the problem began
If the neckline is tight from the start, revisit foundation tension and the selected size. If one sleeve section is wider at the yoke, compare the marker placement and regional counts. If the torso widens only after separation, inspect the row ends and underarm stitch accounting. If the front was straight before edging but waves afterward, focus on the pickups and border tension instead of reworking the whole garment.
For uneven sleeves, check counts, decrease placement and the number of straight rounds before blaming the yarn. For a stiff garment that nevertheless matches the stated gauge, reassess the substituted yarn and sample fabric: matching stitch density alone does not guarantee the same drape. A useful project notebook records where the first difference appeared. Correcting that point is more reliable than trying to hide a structural error with extra trim, forced blocking or an added ornament.
- 20
Keep a final project record for the next cardigan
Save the base pattern name and version, chosen size, yarn labels, hook sizes, dry gauge and your actual final measurements. Include a small sketch showing where the body and sleeve lengths were measured. Note any approved alterations and whether the edging changed the front width or cuff opening. These records are more useful for a second garment than an age label written on its own.
Before giving the cardigan away, include the yarn-specific care instructions and inspect the finish once more. Check both underarms, the front corners and every woven end. If you later make another size, return to that size’s complete instructions rather than multiplying every number from the first garment. The useful result of this guide is a clear sequence of checks: a measured fabric, an accountable yoke, balanced sleeve openings and a finished edge that preserves the fit you planned.
| Check | Illustrative calculation | Limit |
|---|---|---|
| Gauge conversion | 20 stitches ÷ 10 cm = 2 stitches/cm | Use your washed sample and the complete pattern. |
| Width conversion | 24 cm × 2 stitches/cm = 48 stitches | Plain fabric only; not a yoke allocation. |
| Example ease | 43 cm + 5 cm = 48 cm | Assumed ease, not a baby fit recommendation. |
| Four increase corners | 60 + (4 × 2) = 68; 68 + 8 = 76 | Only for the stated net-two increase example. |
| Body after splitting | 22 + 44 + 22 + 4 + 4 = 96 stitches | Boundary stitches already allocated. |
| Sleeve decreases | 40 − (2 × 4) = 32 stitches | No round spacing or wrist size is implied. |
| Length before trim | 15 cm − 1 cm = 14 cm | Measure from the same schematic reference. |
| Stage | Record | Correct before moving on |
|---|---|---|
| Swatch | Dry stitch gauge, row gauge and care response | Wrong density or unsuitable fabric. |
| Foundation | Total and five regional allocations | Missing stitch or tight chain. |
| Yoke | Regional counts, width and depth | Uneven markers or fit mismatch. |
| Sleeve split | Body count and both armhole counts | Unaccounted corner or bridge stitches. |
| Sleeves | Rounds, decreases and length before cuff | Different starting counts or taper schedules. |
| Edging | Pickup distribution and cuff opening | Ruffles, contraction or a restrictive cuff. |
| After care | Dry dimensions, joins and woven ends | Distortion or loose finishing. |
Tips for success
- Use different marker colours for raglan boundaries and row ends so they cannot be confused.
- Write down the first sleeve as you make it; the second sleeve should follow the same counts and shaping.
- Check an edging sample before committing olive yarn around the whole garment.
- Measure widths and lengths from the base pattern’s reference points, not from whichever edge is easiest to reach.
Pattern at a glance
- Time to make
- Several making sessions plus swatching and drying; no timed sample has been completed.
- Skill level
- Intermediate
- Hook
- Use the complete pattern’s hook, adjusted to meet its gauge.
- Yarn weight
- Light / DK for the illustrated concept; match the chosen pattern.CYC standard
- Yardage
- Use the complete pattern’s size-specific quantities, allowing for its specified edging.
- Gauge
- Measure stitch and row gauge after care; all examples here are hypothetical.
- Finished size
- Compare your selected pattern's schematic with the intended wearer's measurements.
Free ebook
Get new patterns, and the ebook
New patterns as they land, plus our free beginner's crochet stitch guide. No daily blasts, unsubscribe in one click.
Frequently Asked Questions
Is this a complete free baby cardigan pattern?
This is a construction and planning guide with an original pumpkin colour concept. For size-specific counts, yarn quantities and a fit schematic, use one of the linked independent garment resources or another complete pattern.
Can I make a larger cardigan by using a bigger hook?
Choose a graded size first. A larger hook changes fabric density as well as dimensions, and it can affect chest width, yoke depth and sleeve fit differently. Check the complete pattern’s size measurements and make its gauge sample before deciding whether a different hook is appropriate.
Why does the front band curl or ripple?
Compare the pickup count and tension with the unedged fabric. Too many pickups can create excess fabric; too few can pull the front inward. Rework a short section with the pattern’s distribution and check it flat before repeating the correction along both fronts.
Can I add pumpkin buttons or a neck tie?
They are not part of the illustrated concept. A closure changes the front-band requirements, and attachments introduce separate suitability and security considerations for baby clothing. Choose a complete garment pattern designed for the closure you intend to use instead of adding a decorative fastening at the end.