Bags & Totes · Mixed construction
Crochet Pencil Case: Zipper & Lining Construction Guide
By Looplader · Project guide · Updated
- Skill
- Intermediate
- Hook
- Choose from a dense-fabric swatch
- Yarn
- Smooth cotton or cotton blend; validate with your own swatch
- Time
- Prototype in separate sittings: swatch and planning first, then outer case, zipper, lining and a real fill test.
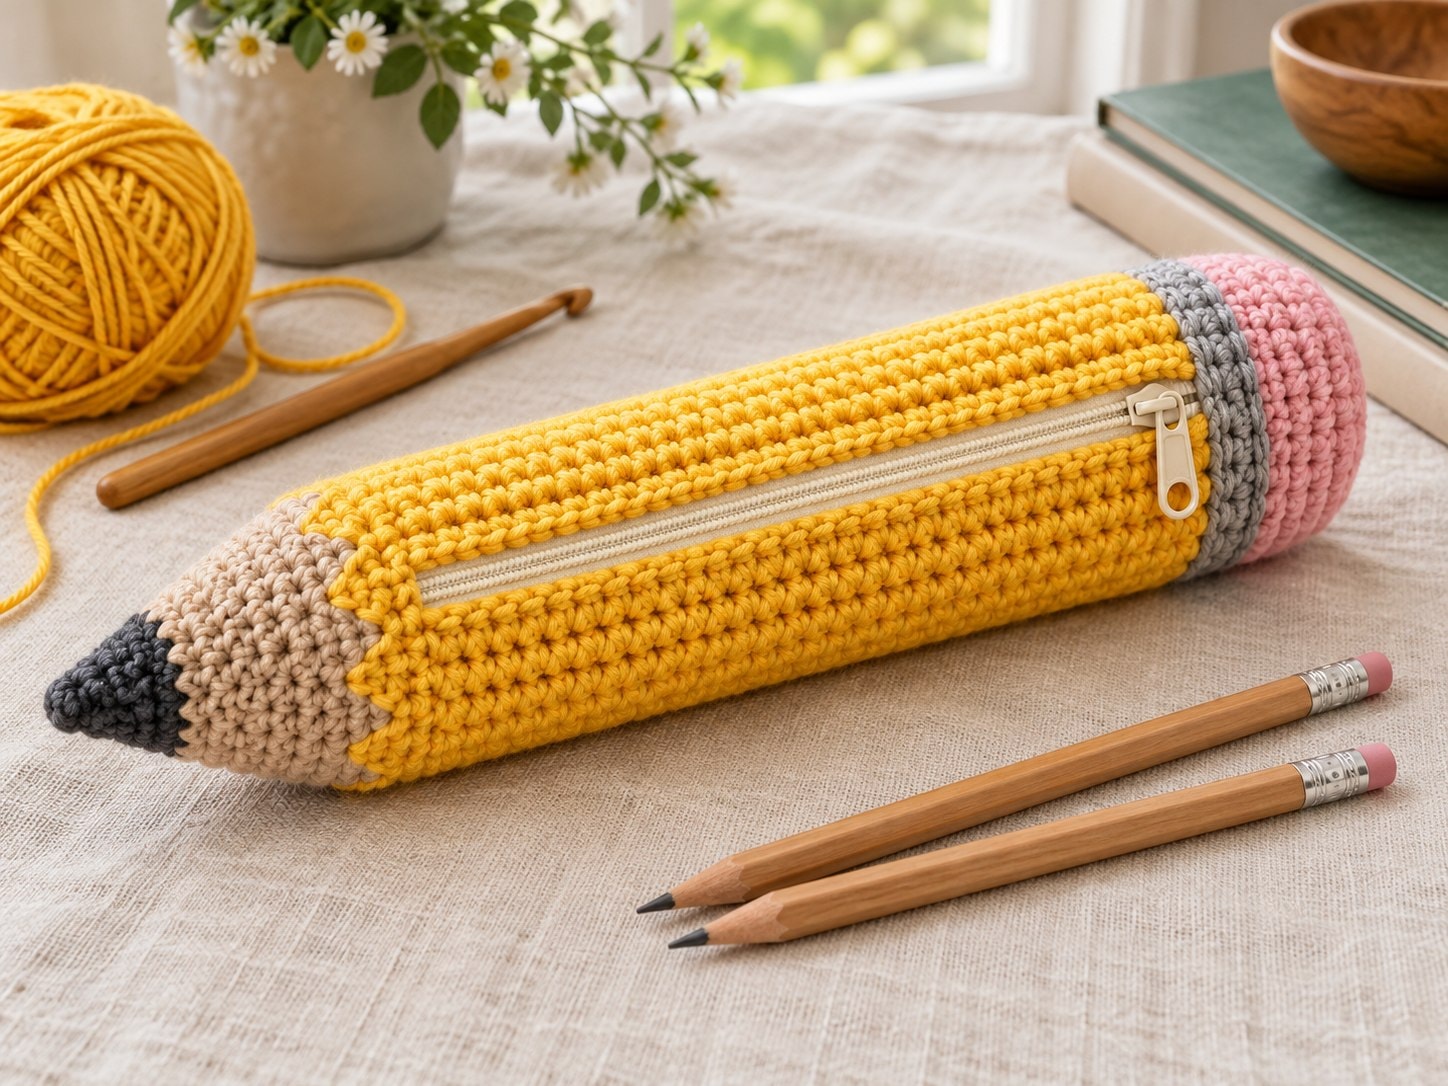
A crochet pencil case works best when it is treated as a small lined bag: choose a dense fabric, build the outer body to your own pencil length, stabilize the opening with a zipper, then add a smooth lining. This illustrated construction guide explains that workflow for an original pencil-shaped case.
The illustrations show the order of work. Set the dimensions from your swatch, zipper and pencil bundle, and keep notes on yarn, hook, gauge and finished measurements as you go.
Pattern, Pinterest & resources
- Craft Yarn Council: Standard Yarn Weight System
Reference for selecting and comparing yarn weight categories; the final fabric density must come from the maker’s own swatch.
- Craft Yarn Council: Crochet Abbreviations
Reference for the US crochet terminology used in this guide.
- Sample Recipes: crochet pencil-case lining discussion
Market research source used only to identify common maker concerns around zipper finishing and a smoother interior; no instructions or imagery are reproduced.
What this project includes
- Starts with a swatch and real pencils, so the zipper and interior are planned around the items the case must hold.
- Separates the outer crochet, zipper and lining decisions instead of treating them as one last-minute finishing step.
- Uses practical checkpoints for dense fabric, seam alignment and zipper travel before anything is permanently finished.
- Shows how to adapt an optional pencil silhouette to your own supplies and measurements.
Detailed project guide
- 1
Decide what the case must hold
Start with the real contents, not a generic pouch measurement. Place your longest pencil, pen or tool on a table and note its length, widest point and how many items you want the case to hold. A pencil-shaped case is decorative, but the useful storage section still needs enough internal width for the intended bundle. A shallow case may be ideal for a few pencils; a larger bundle may need a wider, less sculpted body.
Choose whether the finished object is a literal pencil silhouette or a straight zippered pencil pouch with pencil-inspired colours. The silhouette adds tapered and end-cap decisions; the straight pouch makes zipper placement and lining simpler. Either is valid, but choosing before you swatch prevents decorative shaping from compromising the usable space.
- 2
Swatch for dense, flexible fabric
Work a relaxed swatch in the body stitch using the yarn and hook you intend to use. Let it rest flat, then hold it over a contrasting surface and stretch it gently in both directions. If the background shows through large gaps, change the hook or stitch choice before committing to the case. Pencil points and pen clips can catch on open fabric, so a controlled, close texture is more useful here than a drapey one.
Measure a central section of the resting swatch. Use your own stitches and rows per 10 cm to plan the body, and write those values down with the yarn label and hook. The Craft Yarn Council yarn-weight system is useful for comparing categories, but it does not replace your personal tension check.
- 3
Plan the outer body and zipper together
Choose the zipper only after the outer body plan is clear. The zipper should span the useful opening, not run so close to a shaped pencil tip or end cap that the slider cannot travel smoothly. Mark the intended opening on a paper sketch, then compare the sketch with your planned flat body. Keep enough plain crochet at each end to secure zipper tape and protect the seam.
For a folded rectangle, build one panel long enough to fold into front and back, leaving the top edge open. For two panels, match them before seaming. For a tube, confirm the circumference against the actual pencil bundle before continuing. Stop before any decorative tip or cap until the simple outer body can hold the contents without pulling.
- 4
Build and test the outer body before shaping
Crochet the main body in rows or rounds according to your own swatch plan. Keep the tension steady and use a marker for the first stitch of each round or edge repeat. Lay the work flat every few rows: rippling often signals extra stitches or an overly loose hook, while a body that narrows unexpectedly may signal missed edge stitches.
When the fabric reaches the provisional size, fold or hold it around the actual pencils. This is the first fit checkpoint. The case should have enough room for contents and lining without forcing the fabric open. If it is too narrow or short now, change it before seaming; a zipper and lining cannot correct an undersized outer shell.
- 5
Seam the sides with the opening still free
With right sides oriented as planned, align the side edges using removable markers at both ends and at the midpoint. Join with a method that stays flat and does not pull the body inward. Work a short section, open the case and inspect the seam from both sides before continuing. A bulky or twisted seam steals internal space and can make a zipper look uneven.
Leave the top opening unseamed. For a pencil silhouette, keep the end where the tip will sit separate from the storage opening. Check that the case lies straight after each seam; if one panel shifts, undo the small section immediately instead of trying to hide the mismatch with the lining.
- 6
Add pencil details only after storage fit is proven
A tapered tan tip, small charcoal point and contrast end cap can turn a practical pouch into a pencil-inspired project. Treat those parts as surface or end treatments around a finished storage body, not as a reason to reduce usable room. Shape the tip on a separate sample first and compare its width with the case end. The point should be soft textile decoration, with no hard insert needed.
Keep the zipper opening clear of the tapered section. If the decorative end pulls the body out of shape, simplify it to a flat colour change or a small sewn-on point. A clean, functional pouch is a better final result than a detailed shape that cannot hold pencils comfortably.
- 7
Hand-sew the zipper into a stable edge
Place the zipper closed along the opening and center the slider before sewing. Baste or clip the tape to the inside edge, keeping both sides level so the opening does not twist. Hand stitch a small, even line through the zipper tape and inside crochet edge; do not pull thread tightly enough to pucker the fabric. Work one side, test the zipper, then attach the other side.
Open and close the zipper repeatedly before trimming thread ends. If the slider catches, look for a stitch crossing the teeth, a tape edge folded too close to the coil, or an opening that is shorter on one side. Fix the cause before adding the lining.
- 8
Cut and attach a smooth lining
After the empty outer case and zipper work correctly, use it as the guide for the lining. Cut a lightweight woven lining with seam allowance, fold and finish its top edge, and check that it sits below the zipper without bunching. The lining should smooth the interior and help keep pencil points and clips away from the crochet loops, but it must not be so tight that it makes the outer fabric distort.
Hand stitch the lining to the inside edge with small, controlled stitches. Keep thread, seam allowance and lining edge away from the zipper teeth. Turn the case right side out and run your fingers around the interior; correct any loose fold or exposed edge before putting pencils inside.
- 9
Fill, check and record the real result
Fill the completed case with the exact items it was designed to carry. Zip it closed, turn it in different directions and open it again. Check that pencil points do not snag the lining, the zipper reaches both ends without strain, seams stay flat and the silhouette does not collapse around the contents. Remove a pencil from the middle as well as from the edge; access matters as much as capacity.
Record the actual yarn, hook, gauge, zipper length, lining type, finished flat measurements and content capacity from the physical sample. Keep those notes with your project so you can reproduce the fit and estimate supplies for another case.
Tips for success
- Use a smooth, tightly spun yarn for the first prototype. Highly fuzzy yarn can hide missed stitches and catch on zipper tape.
- Keep the first version plain until the zipper, lining and pencil capacity work. Add the shaped point and eraser cap only after the functional pouch is sound.
- Baste or clip before sewing each zipper side. A zipper that is centered at the start can still twist if the tape shifts while you stitch.
- Use the actual pencil bundle during every fit check; a ruler cannot reveal how clips, erasers and sharpened points behave inside the case.
Pattern at a glance
- Time to make
- Prototype in separate sittings: swatch and planning first, then outer case, zipper, lining and a real fill test.
- Skill level
- Intermediate
- Hook
- Choose from a dense-fabric swatch
- Yarn weight
- Smooth cotton or cotton blend; validate with your own swatchCYC standard
- Yardage
- Varies with case dimensions, yarn and gauge; record usage as you work.
- Gauge
- Measure your own relaxed swatch before setting body width or length; a dense, flexible fabric matters more than a borrowed count.
- Finished size
- Pencil-specific; measure your longest item and build in practical ease after swatching.
Free ebook
Get new patterns, and the ebook
New patterns as they land, plus our free beginner's crochet stitch guide. No daily blasts, unsubscribe in one click.
Frequently Asked Questions
Is this a complete crochet pencil-case pattern?
This is a construction guide with an illustrated project plan. Set the dimensions from your own swatch, zipper and pencil bundle, then record your counts and measurements to make the case again.
Why does a crochet pencil case need a lining?
A lining is optional, but it can create a smoother interior and help keep pencil points, clips and small items from catching on crochet loops. Attach it only after the outer case and zipper are working, because a lining that is too tight or too loose can distort the finished pouch.
What yarn is best for a crochet pencil case?
A smooth cotton or cotton blend is a practical starting point because it can make a firm, low-fuzz fabric. The correct choice is the one that produces dense but flexible fabric in your swatch. Avoid relying on yarn weight alone; hook size, stitch choice and personal tension change the result.
Can I make it without the pencil-shaped tip?
Yes. A straight zippered pouch is the simplest version and uses the same key decisions: dense outer fabric, a stable zipper edge, lining clearance and a real fill test. Add pencil colours or a small flat applique if you want the theme without narrowing an end of the storage space.